Whether it is adding new users, assigning roles or creating invitation links - you can perform various administrative activities in the user and role administration of a universal app. You can access the user and role administration via the edit mode of your universal app.
User and role management of the Universal App
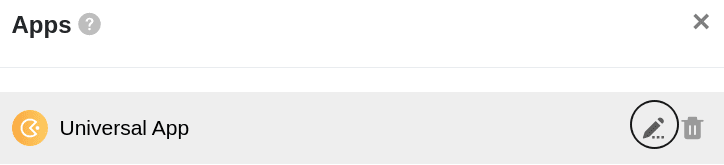
- Open a Base to which you have already added a Universal App.
- Click Apps in the Base header.
- Hover your mouse over the app and click the pencil icon .
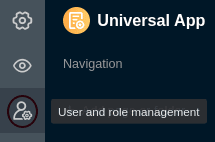
- Open the user and role administration at the top left of the page.
- Make the desired settings.

The settings in detail
User
In the first section you will find an overview of all users who have access to your Universal App. In addition, you will also find the role and status of the respective user.
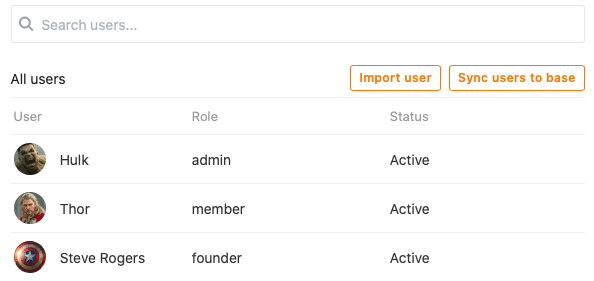
This section also provides you with various options for managing the current users of your universal app.
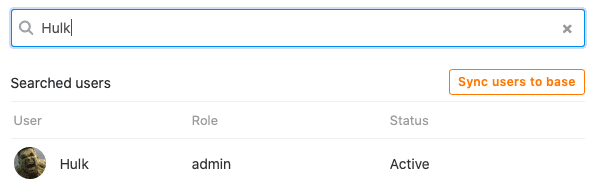
Use the search function to find a specific user. This feature can be especially helpful if you have a large number of app users.
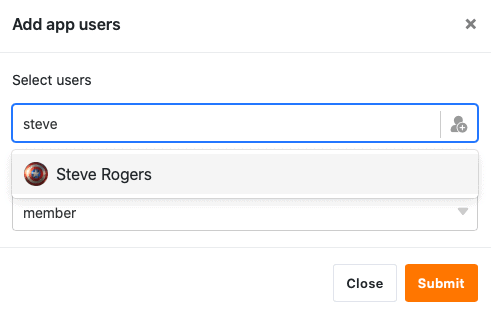
To add a user to the app, click Import User, search for the user using the input field, and then assign a role to the user.
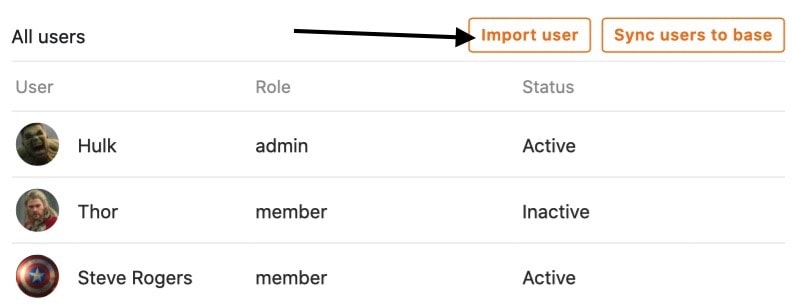
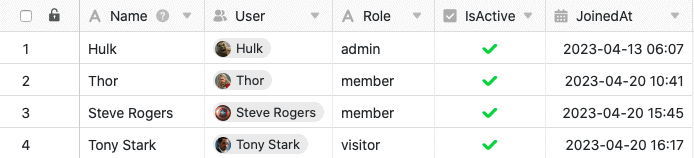
Click Synchronize users with Base to automatically collect the app users in a table of your Base.


If you add more users this way in the future, you can always click Synchronize users with Base again to add the new users to the table.

To delete a user from the app, simply click on the X icon, which you can find to the right of the status of the respective user.
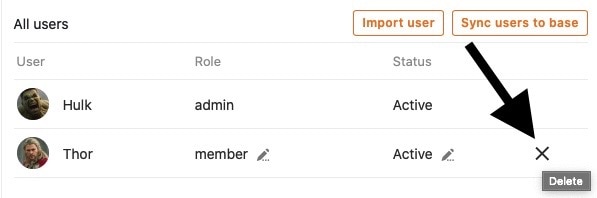
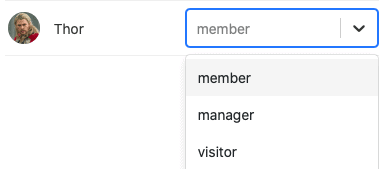
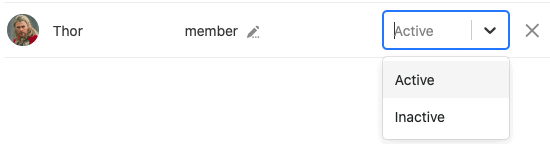
By clicking on the pen icons , which you can find for each user, you can edit their role and status.
![]()
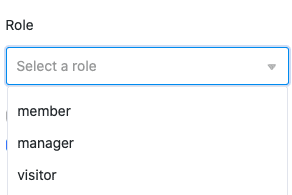
For the role of a user you can choose from all roles in the drop-down menu, which you can define in the next section of the user and role administration.
The status of a user can be set to Active or Inactive. While active users have access to the app and its content, inactive users lose this access.
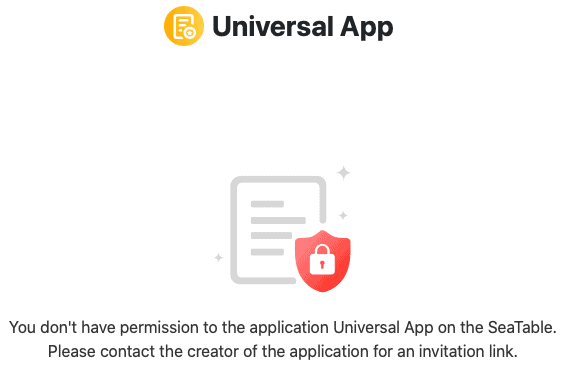
Users who do not have access to your Universal App will see this message:
Rollers
In this section you can define any number of roles, which you can assign to different app users in the section above.
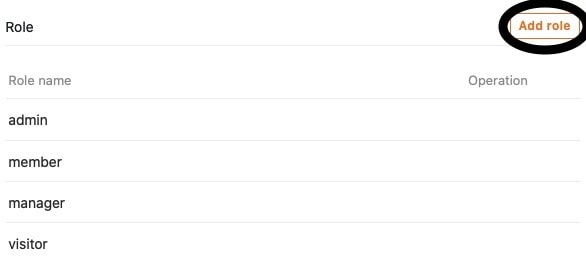
Here you initially define only the names of the roles. You can define which permissions users with the different roles have individually for each page of the app.
Learn more about page permissions here.
Invitation link
In the third section of User and Role Management, you can generate an individual invitation link for the Universal App.
First, define the role of the users who will access the app using the invitation link.
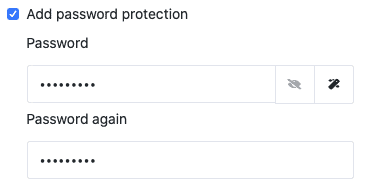
Afterwards, you have the option to set a password that must be entered after opening the invitation link in order to gain access to the app.
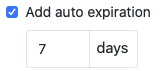
Optionally, you can also add an automatic expiration time to the invitation link, how long it is valid.
With a click on Generate you can have the invitation link created. The link will be displayed below and you have the option to copy or delete it.
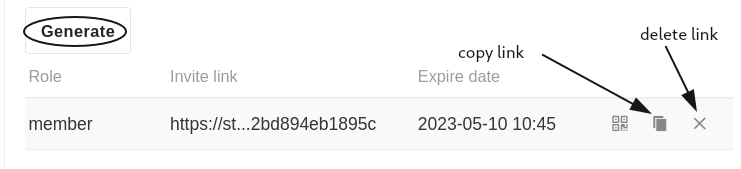
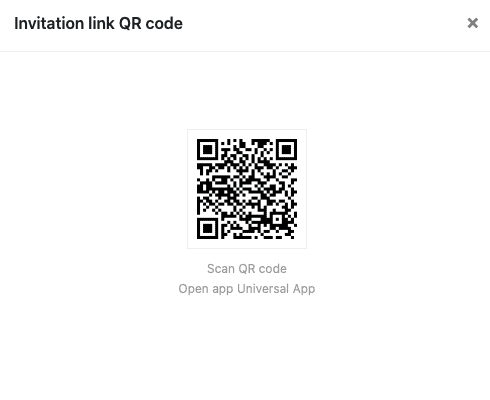
Alternatively, you have the option to generate a QR code to open and share the Universal App.
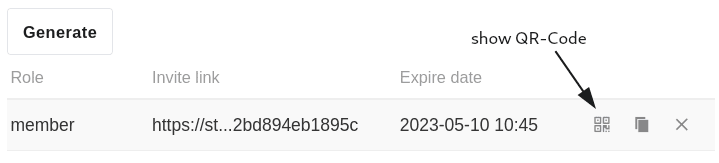
Scan the displayed QR code to open your Universal App or share it with other users to give them access to your app.
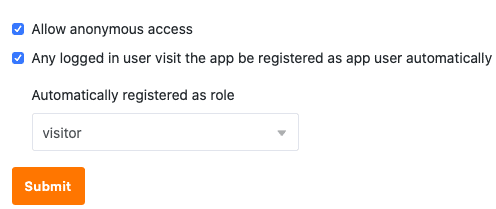
Unrestricted access
In the fourth and final section of user and role management, you can set open access for your universal app. On the one hand, you can allow unregistered users to access your app so that anyone who calls up the link can see (but not change) the data.
However, you can also activate that every logged-in user who uses your app is automatically registered as an app user. In doing so, you determine which role is assigned to the users during registration. Depending on their authorization on the individual pages, users with this role can also add, edit or delete rows .