Sie können Ihr Webformular optisch, inhaltlich und funktional konfigurieren, indem Sie die Formulareinstellungen, die Einstellungen der Felder und das Farbschema anpassen. Letzteres erfordert ein Enterprise-Abonnement.
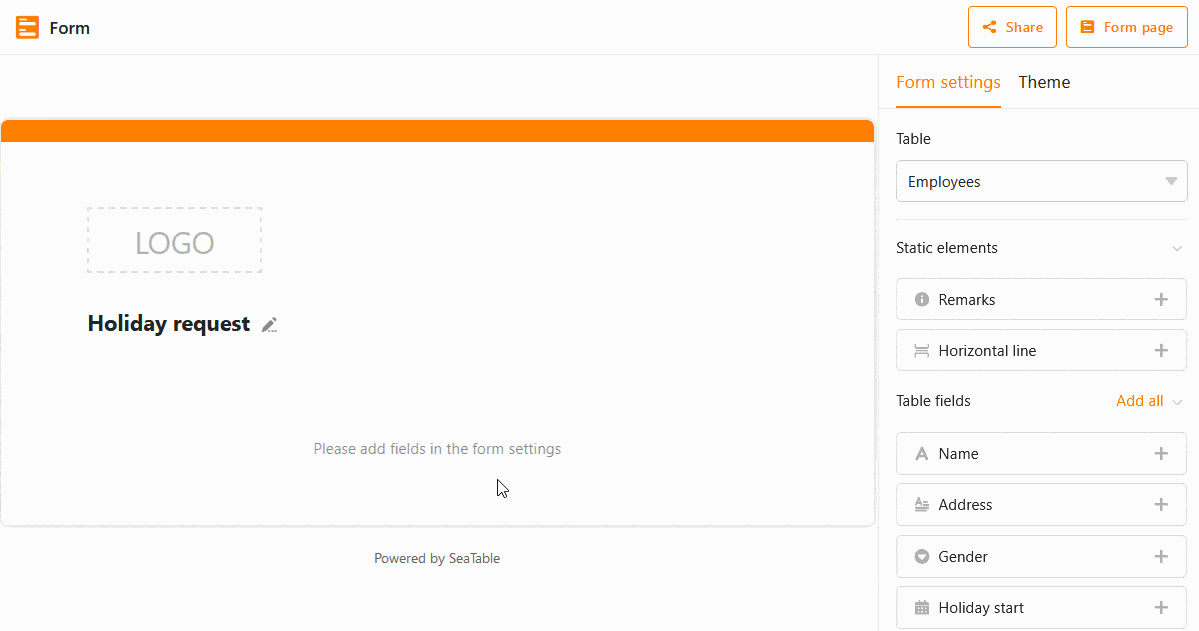
Formulareinstellungen
- Falls Ihre Base aus mehreren Tabellen besteht, können Sie die Tabelle auswählen, für die Sie das Formular anlegen wollen.
- Ziehen Sie statische Elemente und Tabellenfelder per Drag-and-Drop in das Formular oder klicken Sie auf das Plus-Symbol rechts neben den Namen.
- Wenn Sie Hilfetexte zum Ausfüllen der Formularfelder einfügen möchten, können Sie die Schriftfarbe der Hilfetexte definieren.
- Sie können zwischen zwei Benachrichtigungsregeln wählen: Entweder werden keine Benachrichtigungen versendet oder Sie legen einen Empfänger (z. B. sich selbst) fest, der eine Benachrichtigung erhält, wenn ein Formular eingereicht wird.
- Sie haben die Möglichkeit, die Zugriffsberechtigungen nur auf in SeaTable angemeldete Benutzer einzuschränken.
- Mit einem Klick können Sie definieren, dass alle Felder erforderliche Pflichtfelder sein sollen, die von den Nutzern ausgefüllt werden müssen.
- Sie können “Powered by” über einen Regler ein- und ausblenden.
- Fügen Sie eine Standardnachricht hinzu, die ein Nutzer angezeigt bekommt, nachdem er das Formular abgesendet hat.
- Nach Abschluss des Formulars können Sie eine Weiterleitung zu einer Webseite (beispielsweise einer Danke-Webseite oder Homepage) aktivieren.
- Mit einer Einreichungsfrist beschränken Sie, wie lange der Formularlink gültig ist.
Feldeinstellungen
Klicken Sie ein Feld an, um auf der rechten Seite mehr Einstellungsmöglichkeiten zu haben.
- Sie können einen vom Spaltennamen abweichenden Feldnamen angeben, der im Formular angezeigt werden soll. Auf diese Weise ist es möglich, die Spalten in der Tabelle völlig losgelöst vom Webformular zu benennen.
- Schreiben Sie im Hilfetext Anweisungen oder Erklärungen zum Ausfüllen des jeweiligen Feldes auf.
- Entscheiden Sie, ob es sich bei dem jeweiligen Feld um ein erforderliches Pflichtfeld handelt oder nicht. Wenn Sie diese Einstellung durch den Regler aktivieren, müssen die Nutzer das Feld ausfüllen, um das Formular einreichen zu können.
- Entscheiden Sie, ob das jeweilige Feld mit einem Standardwert vorbefüllt werden soll oder nicht. Sie können durch einen weiteren Regler aktivieren, dass die Ausfüllenden diesen Wert nicht ändern können.
- Legen Sie fest, ob ein Feld nur angezeigt werden soll, wenn vorherige Felder bestimmte Bedingungen erfüllen. Dies ermöglicht eine genauere Benutzerführung, da irrelevante Felder im Ausfüllprozess ausgeblendet bleiben.
Sie können die Reihenfolge der Felder im Webformular beliebig verändern, indem Sie auf das Sechs-Punkte-Symbol in der rechten Ecke eines Feldes klicken und das Feld per Drag-and-Drop an die gewünschte Stelle ziehen.
Um ein Feld wieder aus dem Formular zu entfernen, klicken Sie an der gleichen Stelle auf das Papierkorb-Symbol .
Farbschema und Logo
Besonders für Unternehmen und Organisationen kann es interessant sein, ein Webformular dem Corporate Design entsprechend zu individualisieren.
Dazu können Sie Ihr Formular mit Ihrem Logo branden.
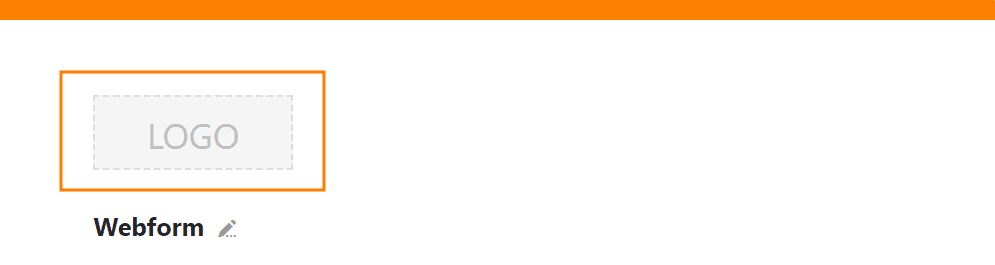
Zudem haben Sie die Möglichkeit, den oberen Farbbalken anzupassen. Klicken Sie dafür oben rechts neben den Einstellungen auf Farbschema.
Alternativ zu dem Farbbalken können Sie auch ein Titelbild hinzufügen.

