Mithilfe von Automationen können Sie Prozesse automatisieren, sodass Sie nicht nur Zeit sparen, sondern auch die Anzahl menschlicher Fehler minimieren. Den ersten Schritt hin zu automatisierten Workflows stellt dabei das Anlegen einer Automation dar.
Anlegen einer Automation
- Öffnen Sie eine Base, in der Sie eine Automation anlegen möchten.
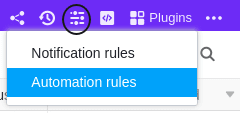
- Klicken Sie auf im Base-Header und anschließend auf Automatisierungsregeln.
- Klicken Sie auf Regel hinzufügen.
- Erstellen Sie die gewünschte Automation und bestätigen Sie mit Abschicken.
Einzelne Schritte
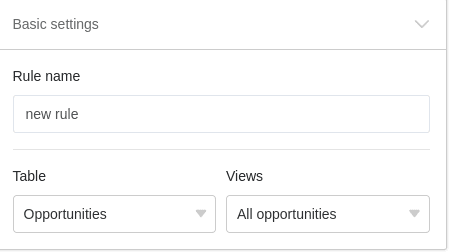
Zunächst nehmen Sie an der neuen Automatisierungsregel Basis-Einstellungen vor. In diesem Schritt benennen Sie die Automation und legen fest, in welcher Tabelle und in welcher Ansicht die Automation wirken soll.
Im nächsten Schritt definieren Sie ein Ereignis, welches als Trigger dient und die Automation auslöst. Zur Auswahl steht, dass Einträge hinzugefügt wurden oder nach einer Änderung bestimmte Bedingungen erfüllen. Darüber hinaus können Sie auch einen periodischen Trigger auswählen, sodass die Automation täglich, wöchentlich oder monatlich zu einem bestimmten Zeitpunkt ausgelöst wird.
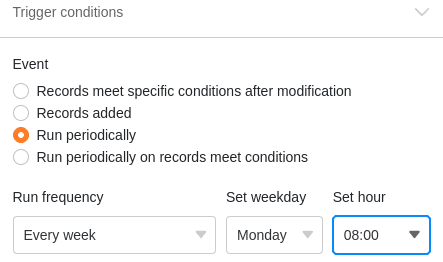
Sie können außerdem die Anzahl der überwachten Spalten eingrenzen und eine oder mehrere Filter-Bedingungen für den Trigger festlegen.
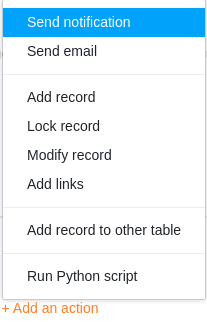
Abschließend legen Sie eine oder mehrere automatisierte Aktionen fest, die vom zuvor definierten Trigger-Ereignis ausgelöst werden. Mögliche Aktionen können je nach Art des Triggers beispielsweise das Versenden von Benachrichtigungen und E-Mails, das Hinzufügen oder Sperren von Einträgen und die Ausführung eines Python-Skripts sein.