Mit der Gruppierungsfunktion können Sie die Tabelleneinträge in Gruppierungen zusammenfassen und einfache deskriptive Statistiken wie die Anzahl der Elemente oder Summen und Durchschnittswerte von Zahlspalten ermitteln.
Einträge in einer Ansicht gruppieren

- Erstellen Sie eine neue Ansicht oder wählen Sie die Ansicht aus, in der Sie die Gruppierung vornehmen wollen.
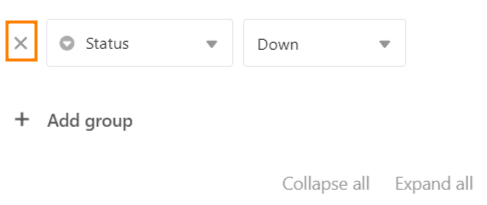
- Klicken Sie in den Ansichtsoptionen über der Tabelle die Option Gruppieren an.
- Gehen Sie auf Gruppierung hinzufügen.
- Wählen Sie im leeren Feld die Spalte aus, nach der Sie gruppieren wollen.
- Entscheiden Sie im zweiten Feld, ob die Gruppierung aufsteigend oder absteigend aufgelistet werden soll.
Gruppenebenen
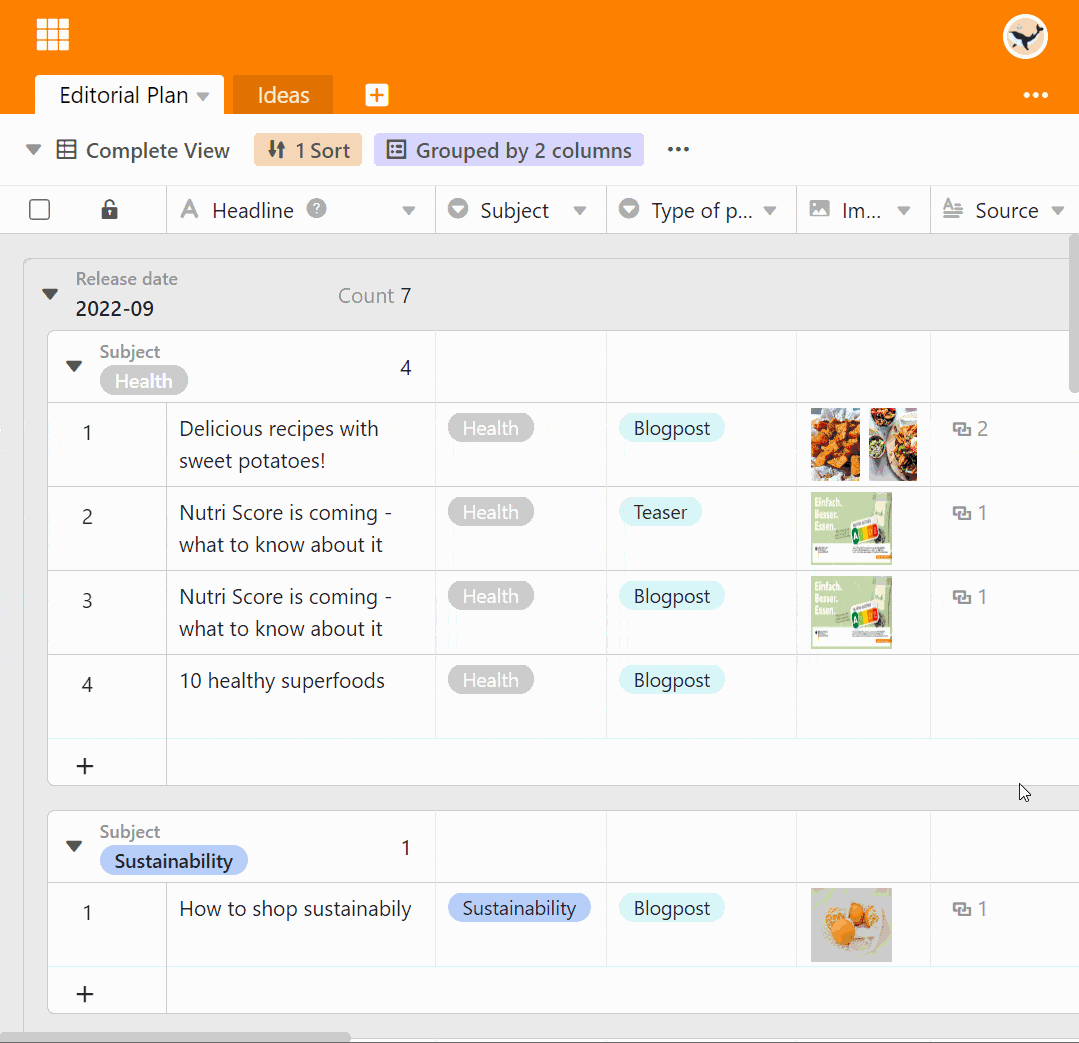
Sie können durch das Hinzufügen weiterer Gruppierungen nach bis zu drei Kriterien gleichzeitig gruppieren. Dadurch entstehen mehrere Ebenen bzw. Untergruppen innerhalb der Gruppierungen.
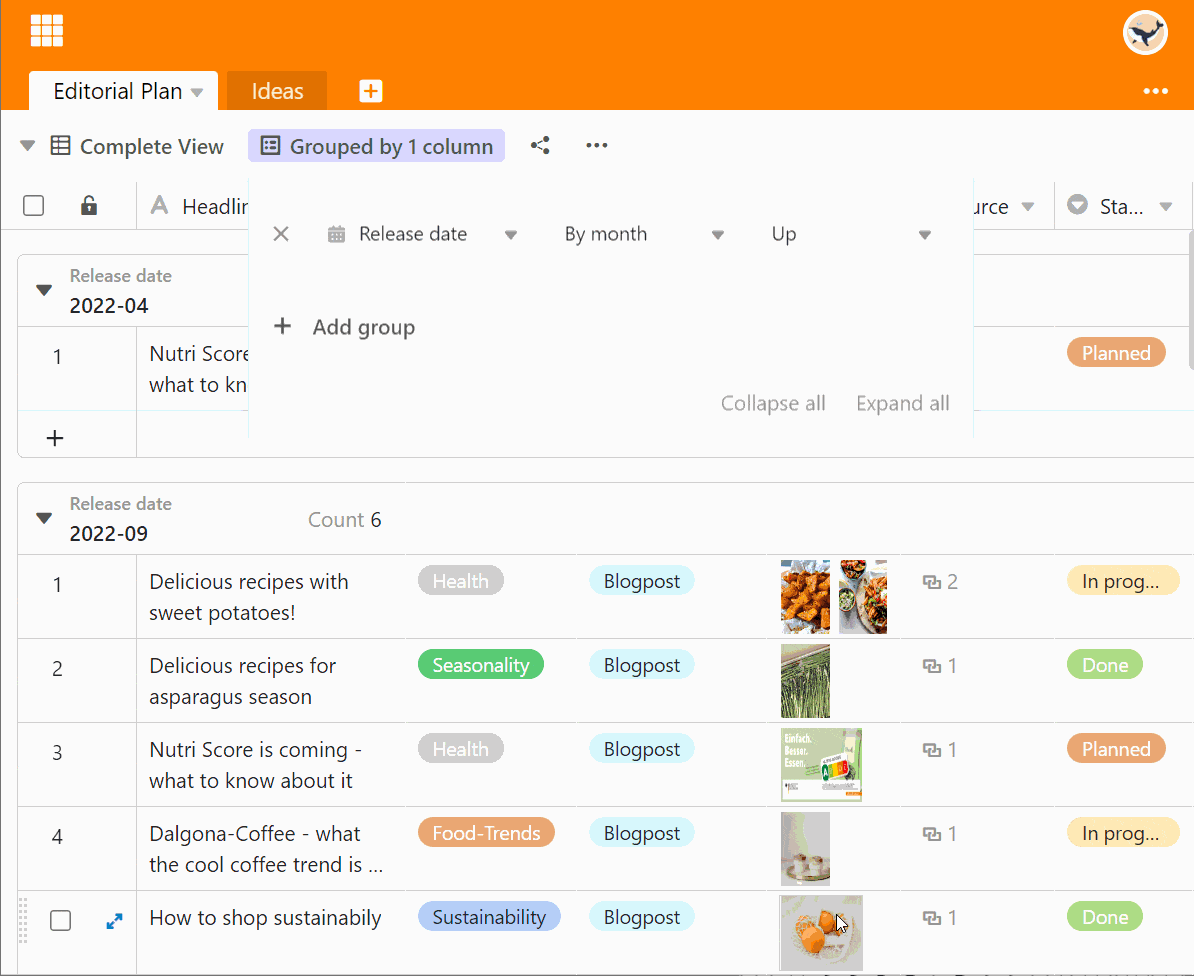
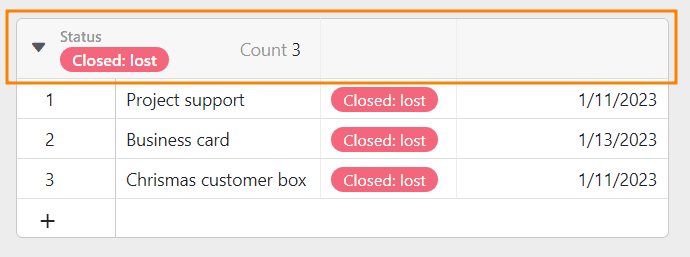
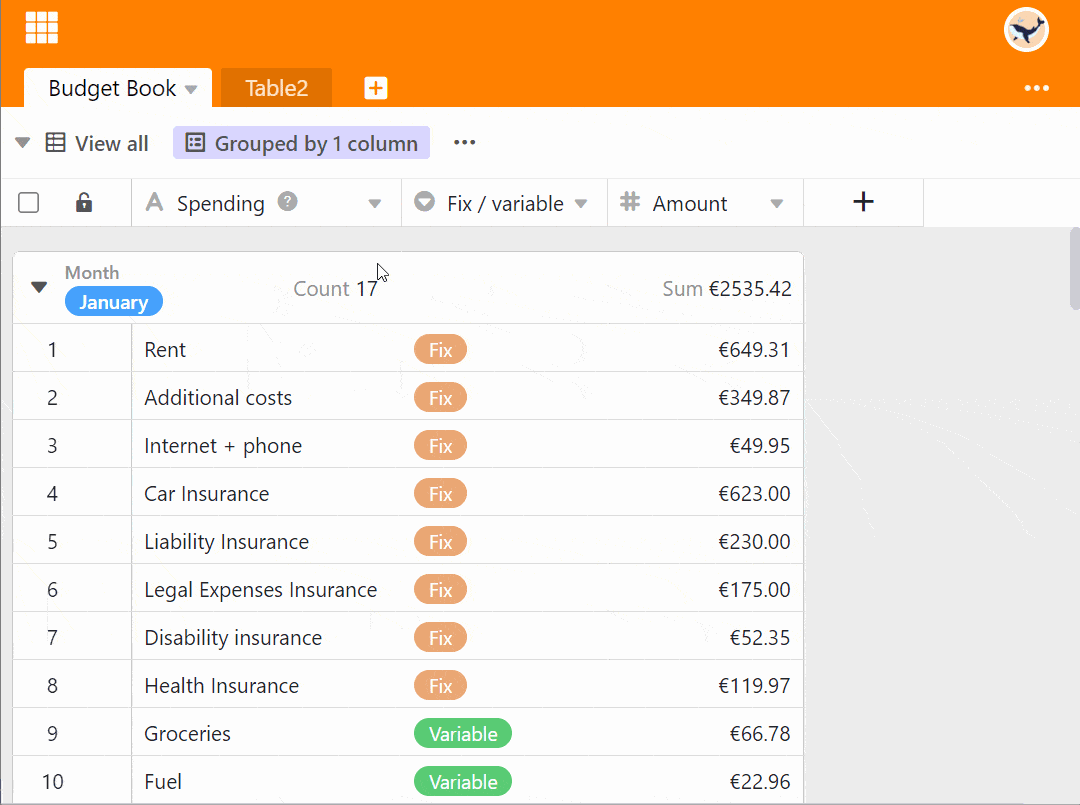
Der Gruppenheader
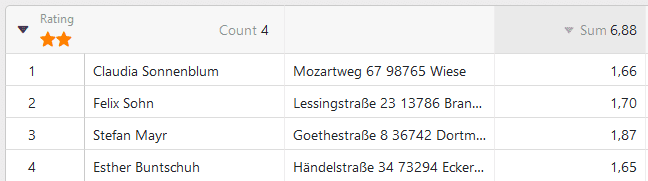
Jede Gruppe hat einen Header, in welchem sowohl das Kriterium der Gruppe als auch die Anzahl der Einträge innerhalb der Gruppe aufgeführt sind.
Bei Zahlspalten haben Sie zudem die Möglichkeit, verschiedene Zusammenhänge der Einträge darzustellen:
- Summe
- Durchschnitt
- Median
- Minimum
- Maximum
- Keine Berechnung
Klicken Sie auf das dreieckige Drop-Down-Symbol vor der Headline der Zahlspalte, um die jeweilige Option auszuwählen.
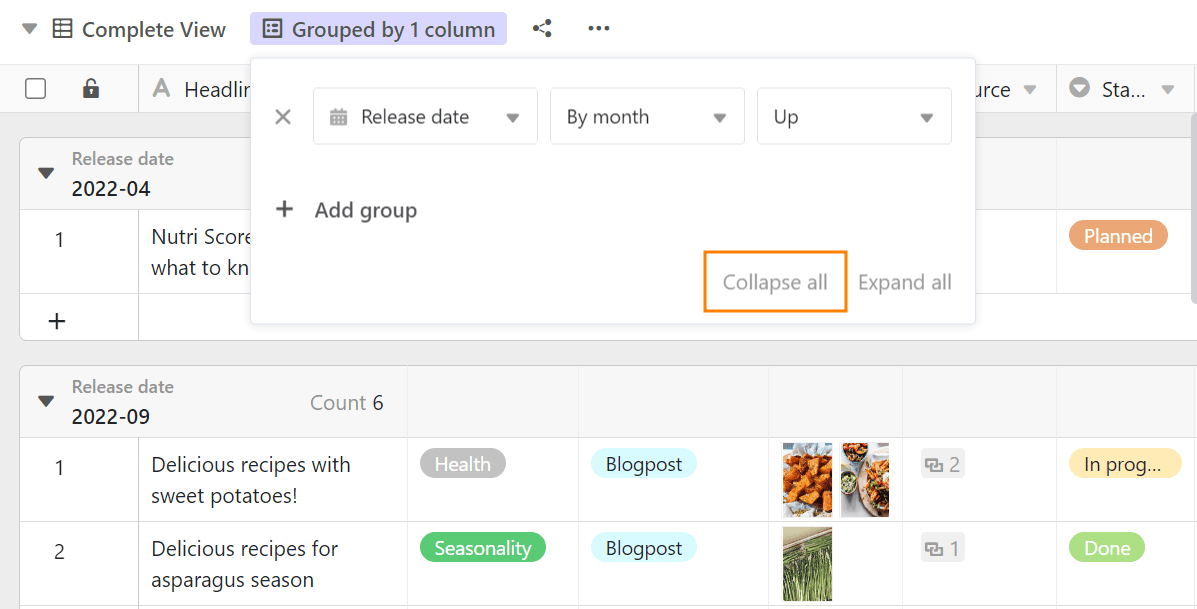
Reduzieren und erweitern der angezeigten Datensätze
Über das dreieckige Drop-Down-Symbol links im Gruppenheader können Sie die Anzeige der Datensätze in jeder einzelnen Gruppe individuell reduzieren und erweitern.
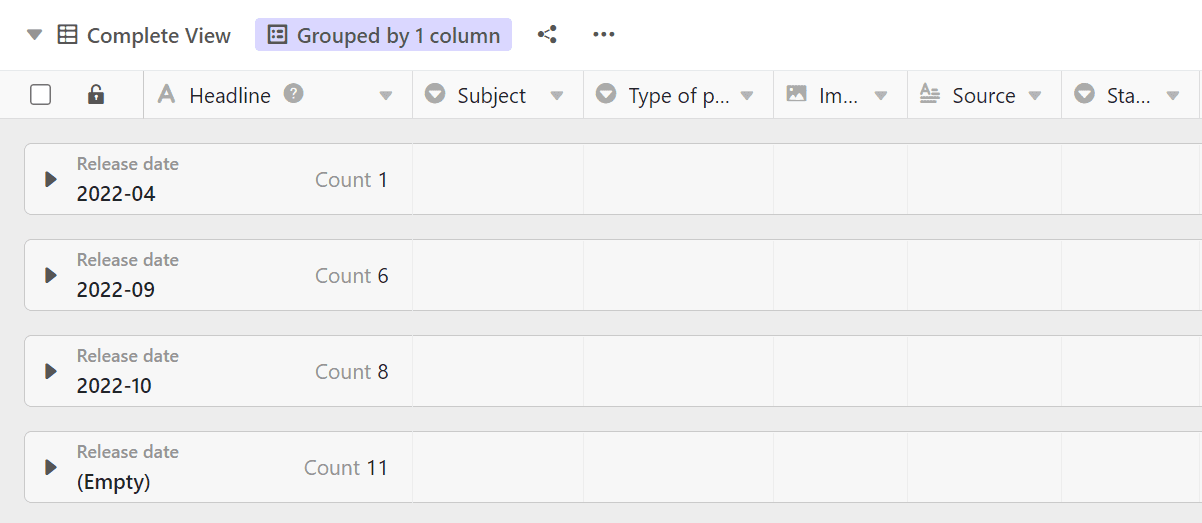
Durch die Optionen Alle reduzieren oder Alle erweitern können Sie die Anzeige der Datensätze mit einem Klick in allen Gruppen einklappen und wieder ausklappen.
Alle reduzieren
Hier finden Sie die Option Alle reduzieren:
Die Anzeige mit aktivierter Option Alle reduzieren:
Alle erweitern
Hier finden Sie die Option Alle erweitern:

Die Anzeige mit aktivierter Option Alle erweitern:

Einträge in eine andere Gruppe verschieben
Sie können durch Ziehen und Ablegen einzelne Einträge neuen Gruppen zuordnen. Hierbei wird das Kriterium, auf dem die Gruppe basiert, beim verschobenen Eintrag angepasst.
Gruppierung aufheben
Natürlich können Sie Gruppierungen jederzeit wieder löschen, indem Sie auf das x-Symbol vor der jeweiligen Gruppierung klicken.