Mithilfe von Automationen müssen Sie die Zeitpunkte einer Statusänderung nicht mehr manuell erfassen, sondern können dies automatisch von SeaTable übernehmen lassen.
Zeitpunkte von Statusänderungen per Automation erfassen
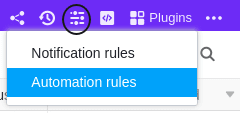
- Klicken Sie im Base-Header auf und im Anschluss auf Automatisierungsregeln.
- Klicken Sie auf Regel hinzufügen.
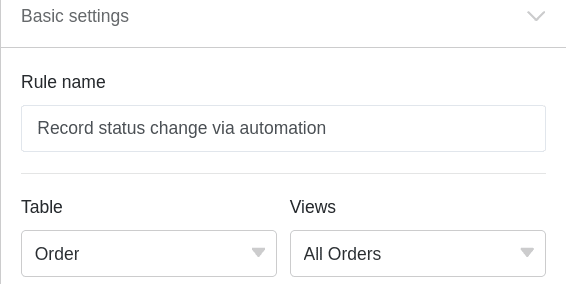
- Geben Sie der Automation einen Namen und legen Sie die Tabelle und Ansicht fest, in der diese wirken soll.
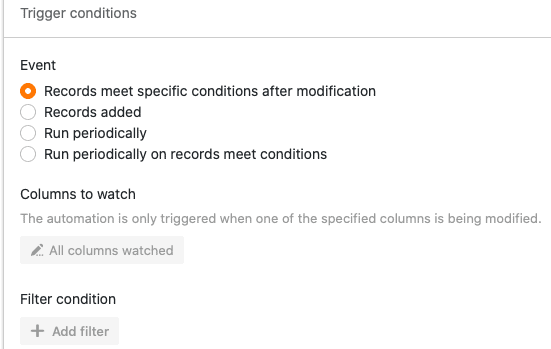
- Definieren Sie das Trigger-Ereignis, welches die Automation auslöst.
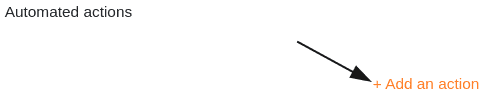
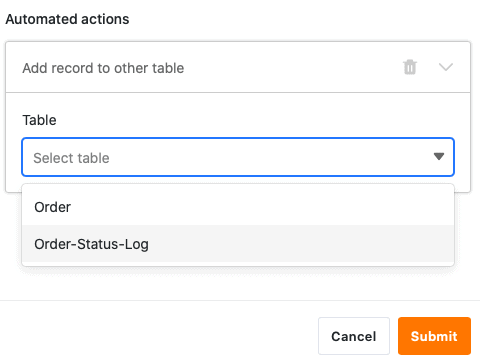
- Klicken Sie auf Aktion hinzufügen und wählen Sie als automatisierte Aktion Neuen Eintrag in anderer Tabelle hinzufügen aus.
- Definieren Sie die Tabelle, in die der Eintrag eingefügt werden soll, sowie die vorausgefüllten Felder.
- Bestätigen Sie mit Abschicken.
Anlegen der Automation
Definieren Sie für die Automation zunächst das passende Trigger-Ereignis.
Wählen Sie anschließend als automatisierte Aktion Neuen Eintrag in anderer Tabelle hinzufügen aus.

Im nächsten Schritt wählen Sie die Tabelle aus, in welche der Eintrag nach Auslösung des Triggers hinzugefügt werden soll.
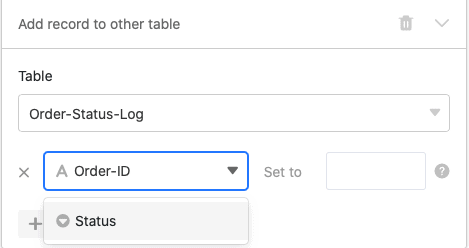
Klicken Sie im Anschluss auf Feld hinzufügen, um die Spalten auszuwählen, für die Sie festgelegte Werte im neuen Eintrag definieren möchten.

Wählen Sie nun im Drop-down-Menü eine entsprechende Spalte aus und definieren Sie den vorausgefüllten Wert im Eingabefeld. Je nach ausgewähltem Spaltentyp haben Sie unterschiedliche Optionen zur Auswahl.
Bestätigen Sie abschließend die Automation mit einem Klick auf Abschicken.
Anwendungsbeispiel
Ein konkreter Anwendungsfall für diese Art von Automation könnte beispielsweise auftreten, wenn Sie die verschiedenen Bestellungen für Ihr Unternehmen in einer Tabelle festhalten möchten.
Dabei möchten Sie die Zeitpunkte, an denen es bei einer oder mehreren Bestellungen in Ihrer Tabelle zu Änderungen am Bestellstatus kommt, automatisch in einer anderen Tabelle festhalten. So können Sie jederzeit den Status Ihrer Bestellungen überblicken und jede Statusänderung von “Zahlung erforderlich” bis “Produkt erfolgreich zugestellt” zeitlich nachvollziehen.
Konkret umsetzen lässt sich dies mithilfe einer Tabelle (“Order”), in der Sie die verschiedenen Bestellungen erfassen, die Sie für Ihr Unternehmen getätigt haben. Erheben könnten Sie in diesem Zusammenhang die Bestellnummer, den Betrag und den Status der einzelnen Bestellungen.

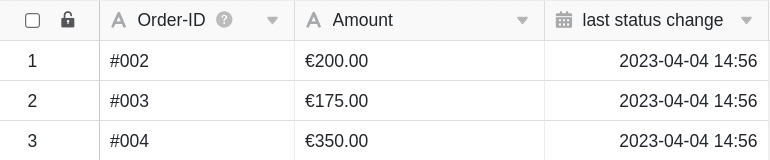
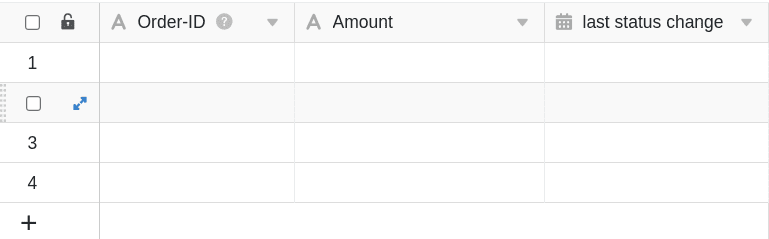
In einer anderen Tabelle (“Order-Status-Log”) möchten Sie ebenfalls die verschiedenen Bestellnummern samt den dazugehörigen Beträgen sehen. Zusätzlich wird in dieser Tabelle in der Datum-Spalte “last status change” der Zeitpunkt der letzten Statusänderung eingetragen.
Mithilfe einer Automation soll nun jedes Mal, wenn Sie den Status einer Bestellung in der Tabelle “Order” verändern, der Zeitpunkt der Statusänderung in der Tabelle “Order-Status-Log” in die Spalte “last status change” hinzugefügt werden. Zusätzlich werden mithilfe der Automation auch die Bestellnummern und Beträge automatisch der Tabelle “Order-Status-Log” hinzugefügt.
Anlegen der Automation
Als Erstes geben Sie der Automation einen Namen und wählen sowohl die Tabelle (“Order”) als auch die Ansicht (“All Orders”) aus.
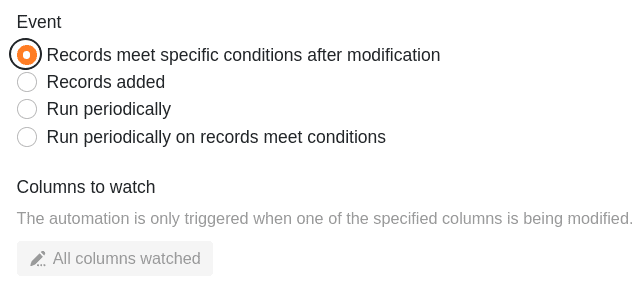
Als Trigger-Ereignis der Automation wählen Sie die Option Einträge erfüllen nach Bearbeitung bestimmte Bedingungen aus.
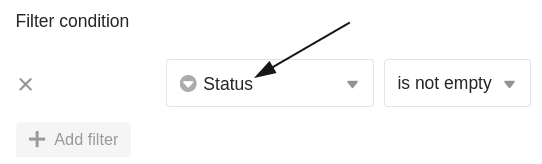
Fügen Sie als Filterbedingung hinzu, dass die Spalte Status in der Tabelle “Orders” nach der Bearbeitung nicht leer sein darf, um die Statusänderungen zu erfassen.
Als automatisierte Aktion definieren Sie die Aktion Neuen Eintrag in anderer Tabelle hinzufügen.
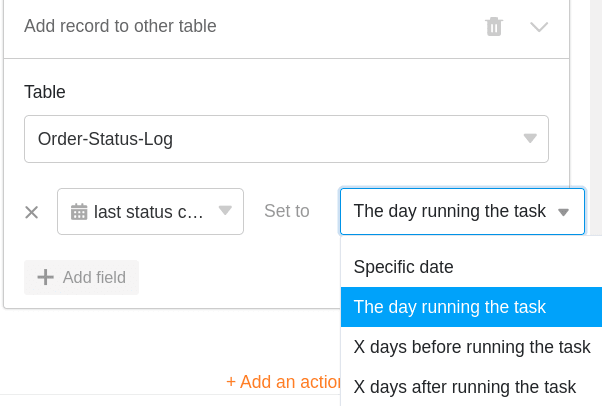
Im nächsten Schritt wählen Sie als Tabelle, in die nach Auslösung der Automation der Zeitpunkt der Statusänderung hinzugefügt wird, die Tabelle “Order-Status-Log” aus.

Anschließend definieren Sie die Werte, mit denen bestimmte Felder vorausgefüllt werden sollen. Damit stets der jeweilige Zeitpunkt einer Statusänderung automatisch der Datum-Spalte “last status change” hinzugefügt wird, definieren Sie für diese Spalte den Wert Tag der Ausführung.
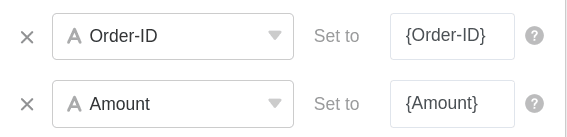
Um die verschiedenen Bestellnummern und die dazugehörigen Beträge in der Tabelle “Order-Status-Log” zu zitieren, schreiben Sie die Spaltennamen in geschweiften Klammern in das jeweilige Textfeld: {Order-ID} & {Amount}
Testen der Automation
Wenn Sie nach der Bestätigung der Automation den Status verschiedener Bestellungen in Ihrer Tabelle verändern, …
… werden sowohl die Zeitpunkte der Statusänderungen als auch die definierten Einträge (Bestellnummer & Betrag) automatisch in die Tabelle “Order-Status-Log” eingetragen.