The following article serves as an overview of the topic of importing data using CSV in SeaTable. In the article you will find detailed instructions on how exactly to import CSV files into SeaTable. In addition, we will introduce you to specifics that you should be aware of when importing data.
Three different import options
With the import function of SeaTable you can transfer CSV files into your bases. In total, there are three different options available to you:
- Import a CSV file as a new table into a new Base.
- Import a CSV file as a new table into an existing base.
- Import a CSV file into an existing table.
Option 1: Import as new base

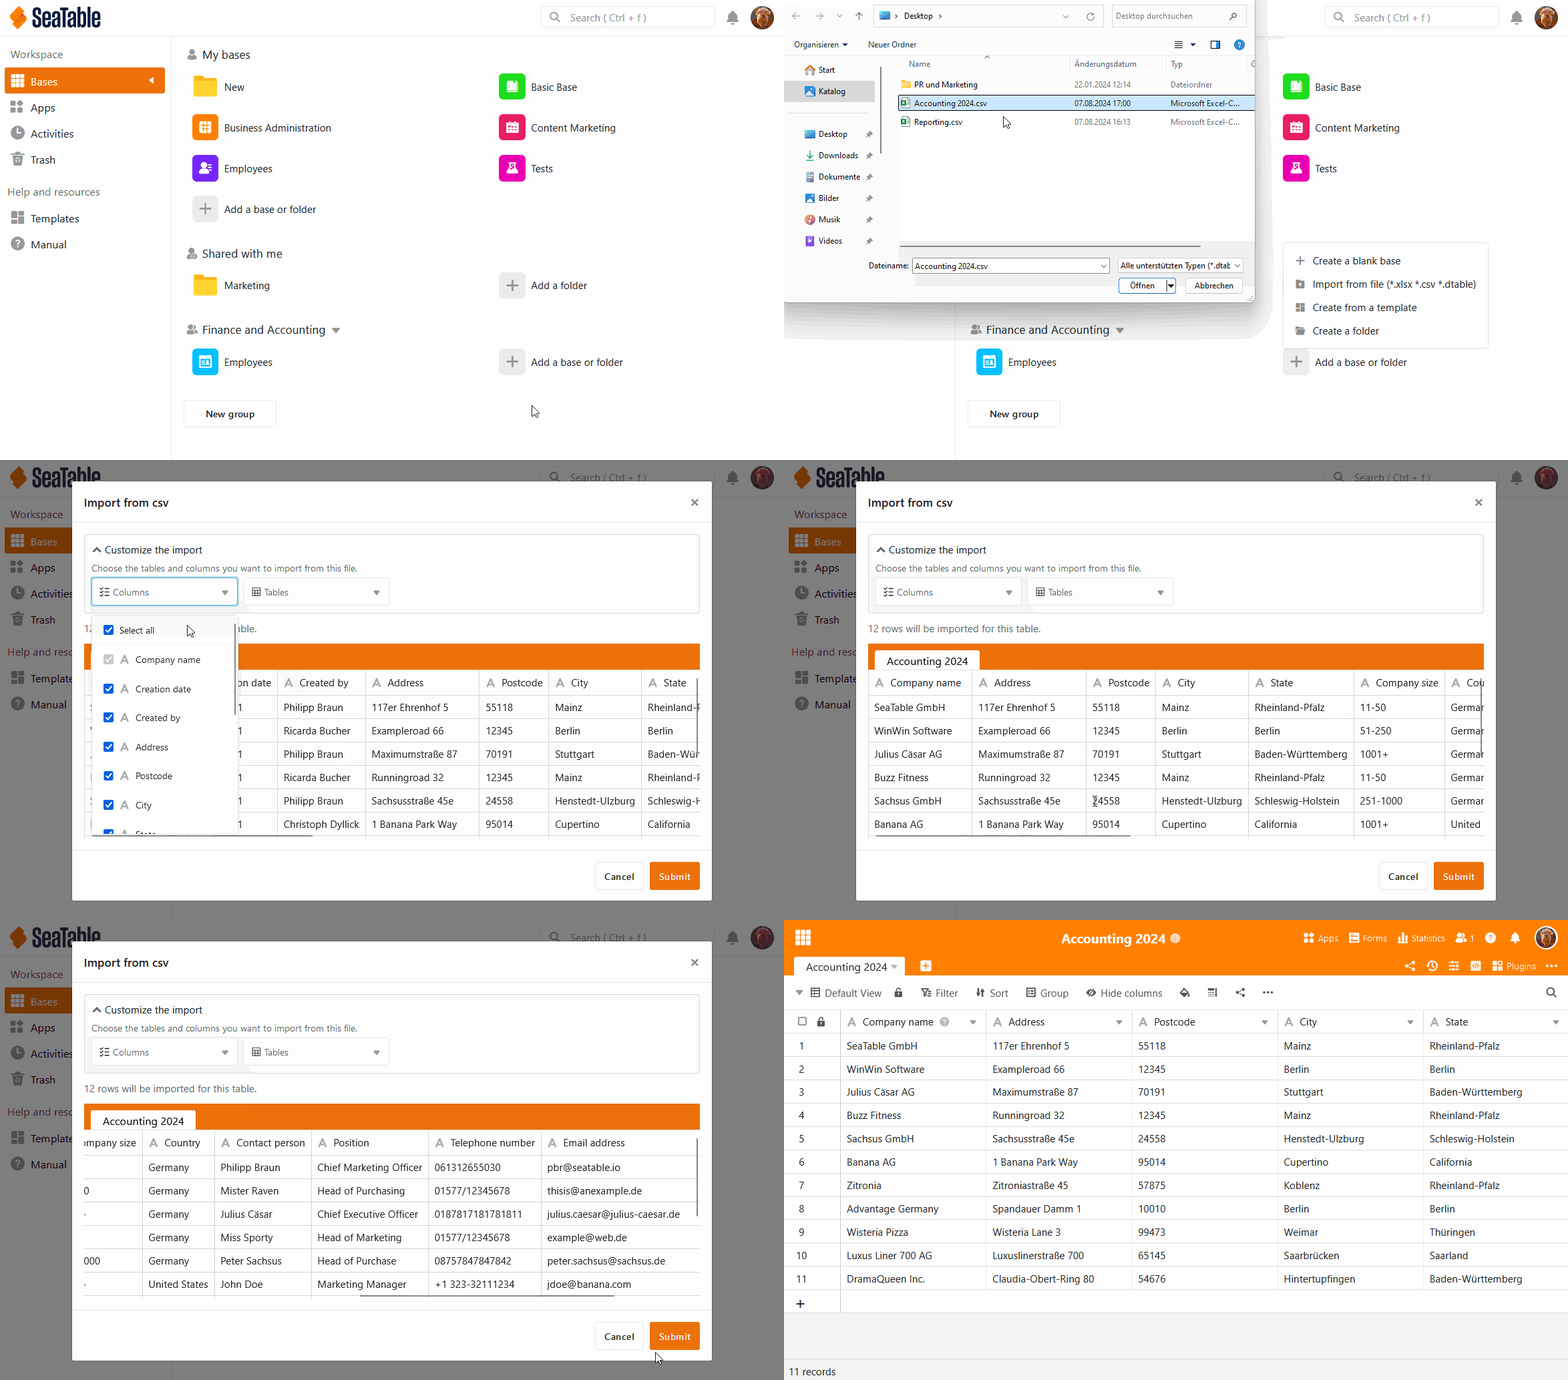
- Switch to the SeaTable home page.
- In the My Bases workspace or within a group, click Add a Base or Folder.
- Click Import Base from File (XLSX, CSV or DTABLE).
- In the opening file overview from your device, select the desired CSV file you want to import.
- Confirm either by double-clicking the selected file or by clicking Select or Open.
- A preview window will then open so that you can check how the imported data will look in SeaTable. Here you can select exactly which columns of the CSV file you want to import.
- Click on Submit to complete the import.
Option 2: Import as new table

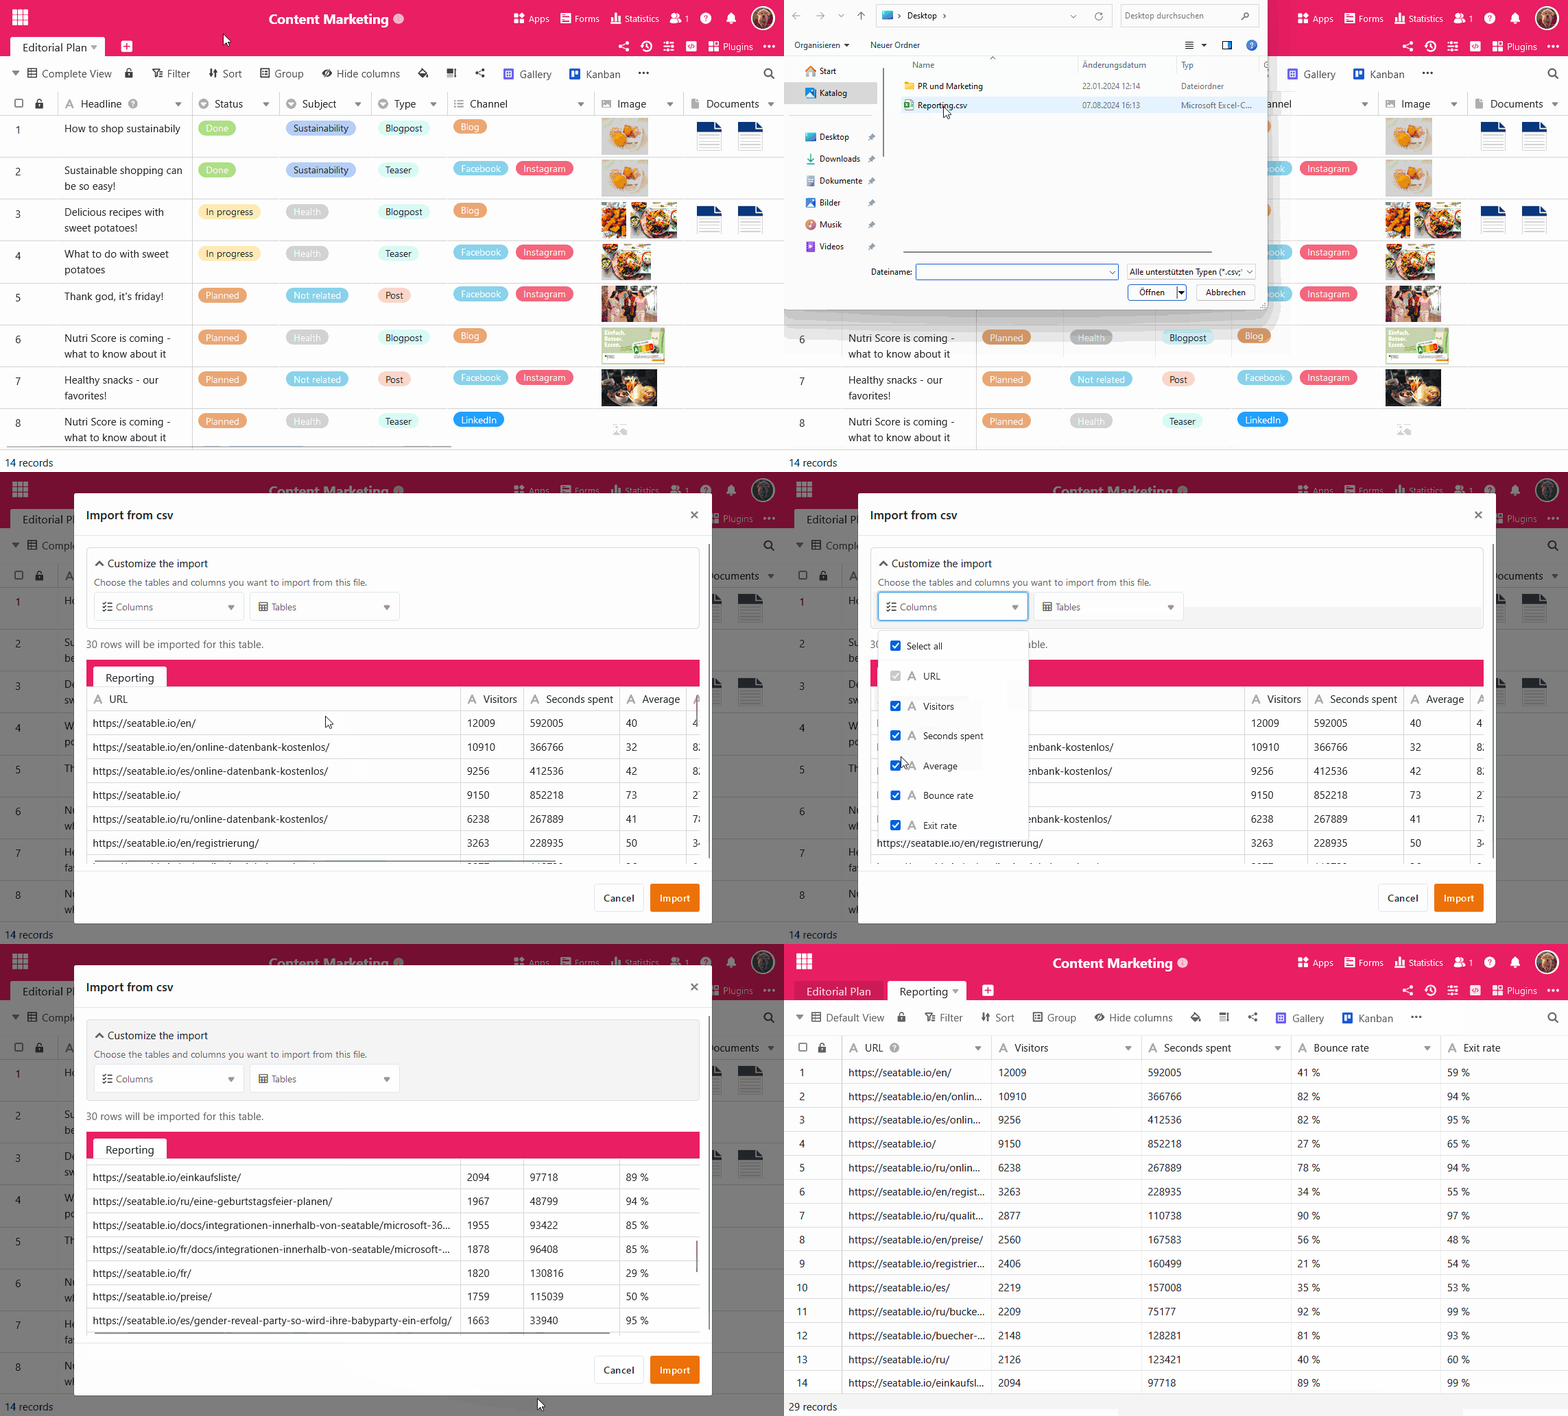
- Open any existing base.
- Click the [+] icon located to the right of the name of the last table.
- Click Import CSV or XLSX file.
- In the opening file overview from your device, select the desired CSV file that you want to import as a new table.
- Confirm either by double-clicking the selected file or by clicking Select or Open.
- A preview window will then open so that you can check how the imported data will look in SeaTable. Here you can select exactly which columns of the CSV file you want to import.
- Click on Submit to complete the import.
Option 3: Import into an existing table

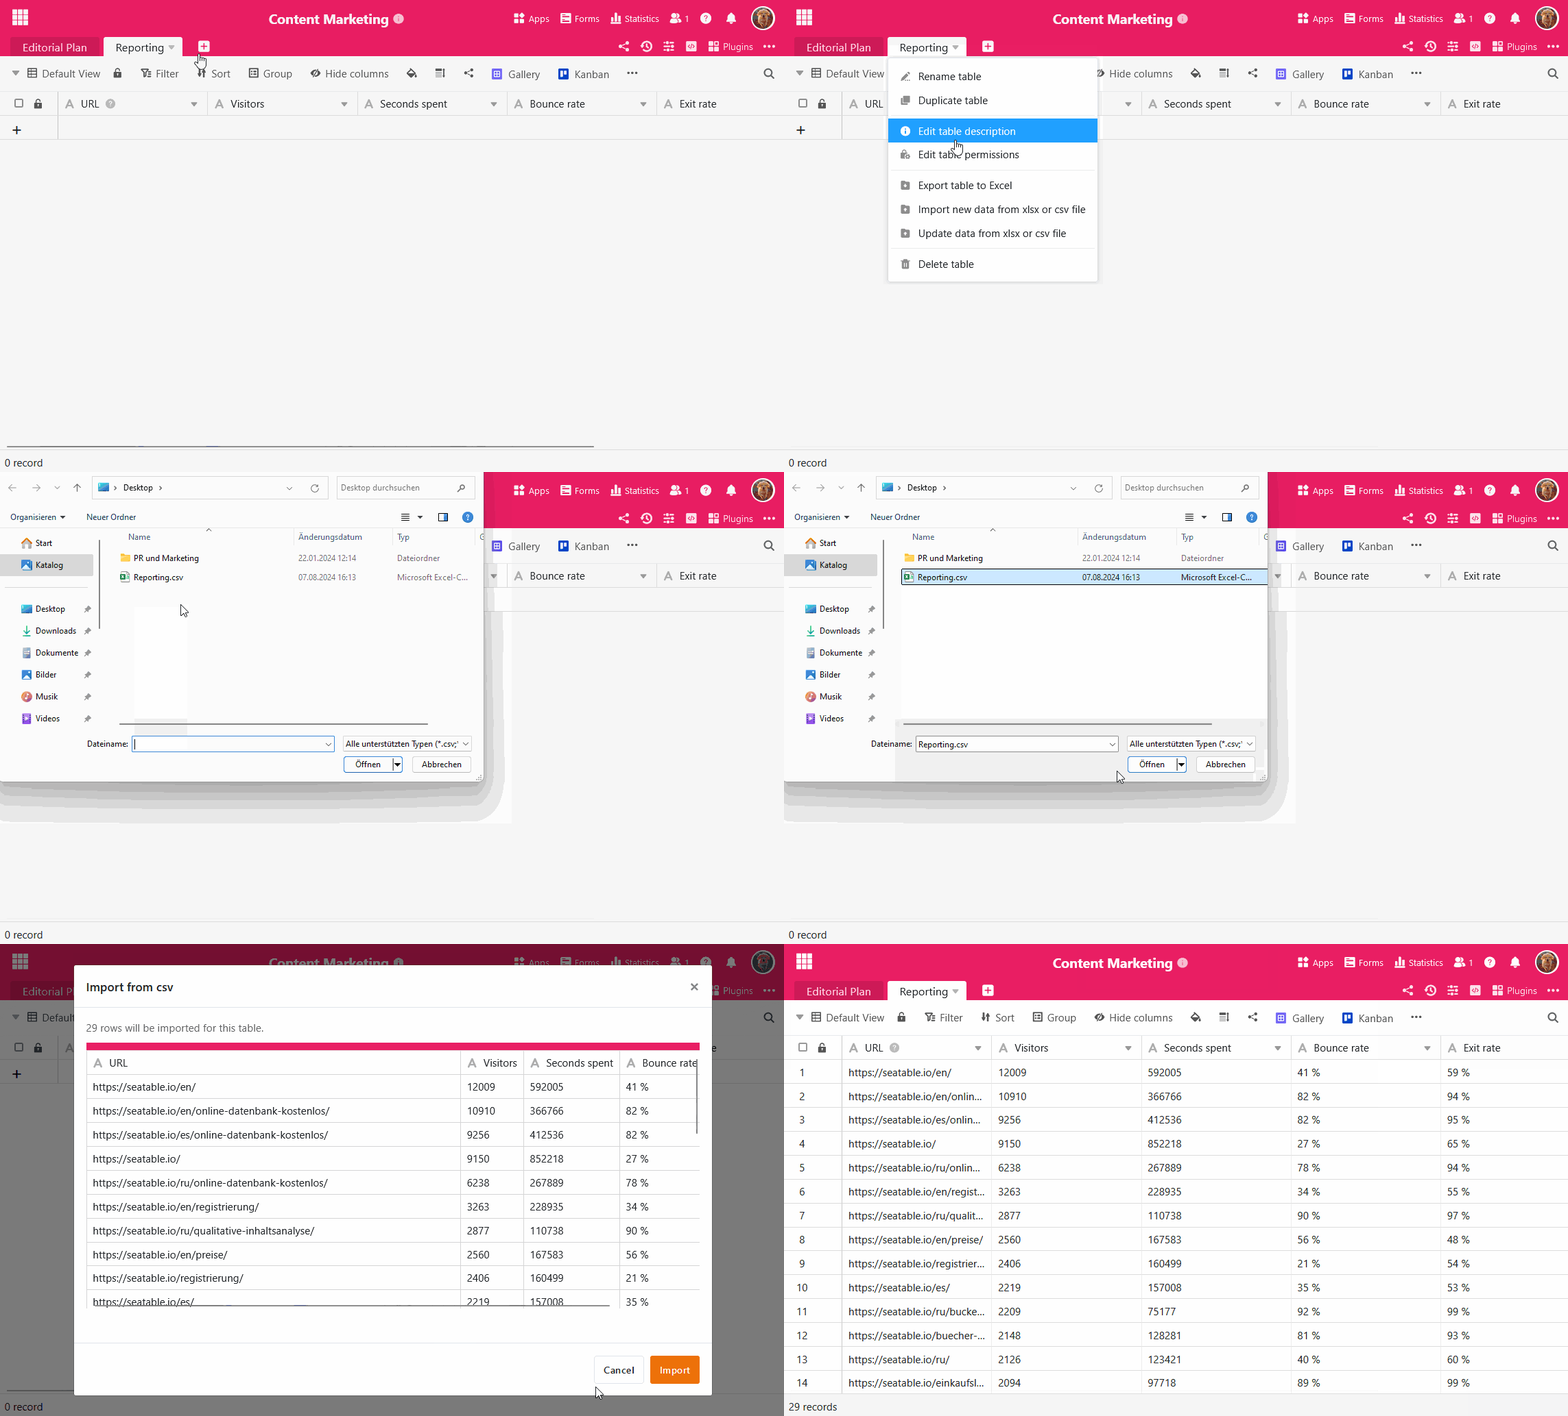
- Click on the triangular drop-down symbol to the right of the name of your table.
- Select Import new data from CSV or XLSX file.
- In the opening file overview from your device, select the desired CSV file that you want to import into the table.
- Confirm either by double-clicking the selected file or by clicking Select or Open.
- A preview window will then open so you can check how the imported data will look in SeaTable. Click Submit to complete the import.
Notes on CSV import
With the CSV import you can import virtually all your data into SeaTable. Here are a few more notes to keep in mind when importing CSV files:
- When importing CSV files, the preview may not show all the data that will be imported into the table, since the preview can display a maximum of 201 rows.
- The values that are in the first row of a table imported with CSV are always automatically used by SeaTable as column names and thereforeremoved from the first row during import. All other data in the table will be moved up one row accordingly.
- When importing CSV files, the type of data is not automatically detected by SeaTable. Consequently, the column type does not adapt to the individual data (unlike the Excel import).
Frequently asked questions
What must the CSV file look like that is to be imported into the table?
The CSV file must be formatted according to the UTF-8 standard and contain the suffix .csv at the end of the file name.
Will existing data be replaced during import?
No, no data is replaced during import.
Will the imported data simply be inserted under the existing rows ?
Yes, the imported data will be inserted in the corresponding columns of the table under the already existing rows .
What error messages may appear if the data import fails? In case of a failed data import, the following error messages may appear: This error message appears when the content of the file you want to import is invalid. One reason for this error message may be, for example, that the file you have selected is not a CSV file. It is best to look up again under the first point of this FAQ, how exactly a CSV file must look like for the import. This error message appears when the file import fails due to internet connection problems. Please make sure your device is connected to the Internet and try again.


