Let's start with how to find your way around SeaTable. SeaTable is a web solution that you can easily use with your browser. We will briefly go through the different elements of the interface and we will show you what each icon means and where to find the things you need when creating your bases.
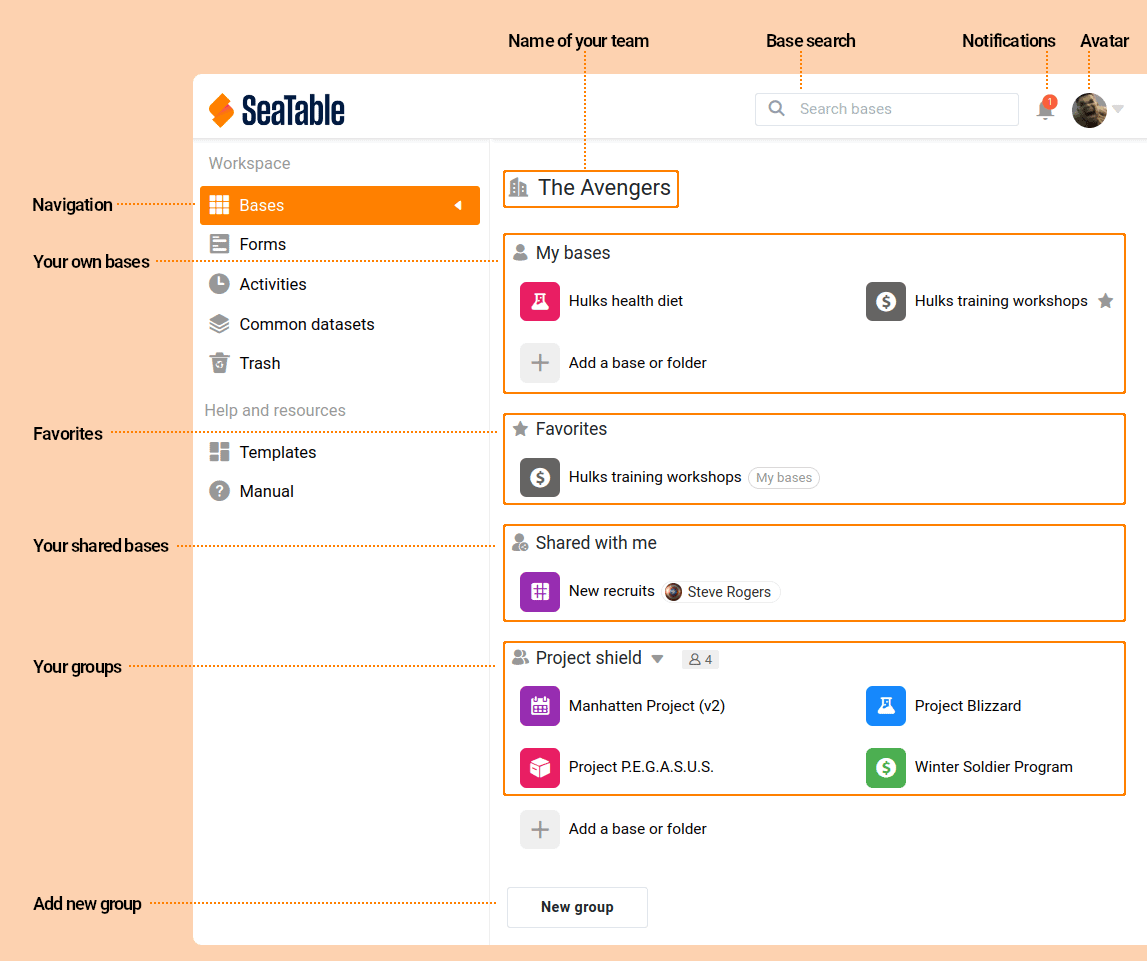
Open your browser, go to the SeaTable login page and log in with your access data. The start page should look something like this:
The home page
The start page is divided into two areas: The navigation (left) and the overview of bases (right). You will probably not yet see any or only a few bases. However, this will change shortly. A base is always represented by a colored tile and its name to the right of it.
What exactly is a base?
A base is a database. A base consists of one or more tables and can contain many thousands rows . All bases to which a user has access are displayed on the start page. SeaTable distinguishes between different workspaces depending on who created the base or who has access to it. The corresponding keywords are here:
- My bases: You have created bases in this area yourself and as long as you do not explicitly share the base with someone or a group, only you have access to it.
- Favorites: You can mark any base as a favorite to always find it in this area.
- Groups: SeaTable thrives on collaboration. You can use groups to make a base accessible to a group of people.
The base editor
Now open one of your bases by clicking on one of your bases with the mouse. If you do not yet have a base, simply create one. The name of your base does not matter for now.
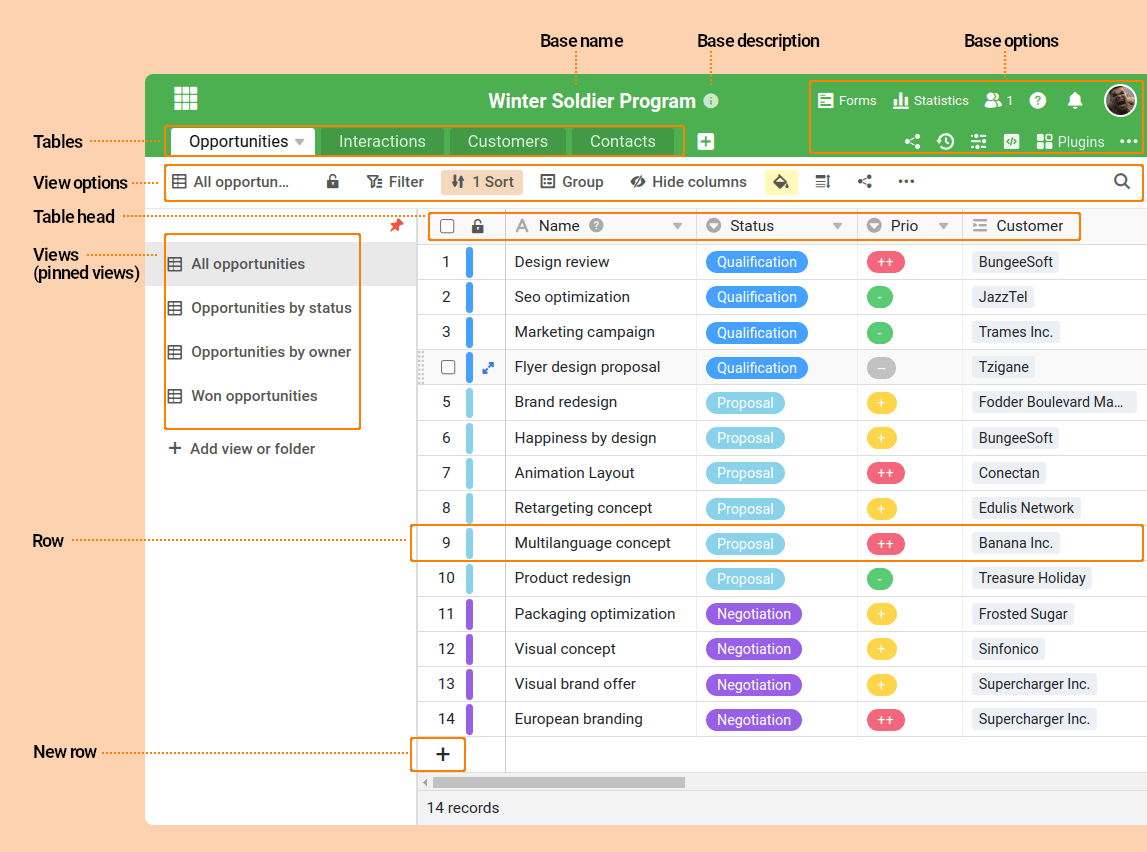
You will initially only see three empty cells in your base, so don't be confused when we explain the various elements using a filled example base.
Phew, the first sight of a base can be quite frightening. There are so many buttons and interaction options waiting to be used. Let's take a look at the various elements in detail.
Tables
In the header area of each base, the tables of your base are displayed next to each other as tabs. Tables in SeaTable are comparable to spreadsheets in Excel or the tables in a database. Depending on whether you already know one or the other. You can create columns in each table to record and save the desired information. While all columns are the same in Excel, in SeaTable you have to select a column type when you create it. This allows you to specify what information you want to save in this column. Sounds complicated, but it's not:
- You can only save numbers in a number column, but not images
- You can only save date values in a date column, but not numbers.
- In a ... - I think you have understood the principle.
rows
You can save your information in a table at rows . Each row represents a data record. For example, if you have a table Expenses with 50 rows , then you have entered an expense in each of the 50 rows .
Views
A view is a user-defined representation of rows in a table. Each view is defined by the sorting, filters, grouping, column hiding and other view settings used.
A table can contain one or more views. All views of a table access the same dataset. This means that if a cell value is changed in a view, the value is changed in the underlying table and therefore also in all views of the table.
We will examine the concept of views in more detail in this online course and illustrate it with specific use cases.
Summary
In this lesson you have become familiar with various elements of the SeaTable interface. Don't be intimidated by the many possibilities of the user interface. In the next part of this online course, we will start building your own expense management system, which will allow you to use and familiarize yourself with many of SeaTable's features.
If you would like to learn more about the SeaTable user interface and terms, we recommend our glossary. It explains the SeaTable user interface and terminology in detail.
Help article with further information
In the following articles, we will always include a section at the bottom of the page with links to our help section. This way, we will guide you through this online course, but not visualize every mouse click with a screenshot. If you get stuck, the help articles should help you.


