Web forms are the tool of choice for letting team members and external third parties enter new records into your tables. Users access a form via a link, so there's no need to share the table. As a result, web forms are especially useful for data entry by large numbers of people inside and outside your team.
Get familiar with SeaTable's form feature to conveniently collect data via web forms!
Types and functioning of web forms
SeaTable knows two web form types:
- Classic web form: The classic web form is ideal for online surveys and structured collection of new data. Table columns are integrated using form fields and users are guided through the completion process. For access, create a link that allows users without a SeaTable user account to fill out the web form. A completed web form corresponds to a record or an added row in the corresponding table.
- Collection form: Collective forms make it easy to update and extend data created by a team. The advantage over the classic form is that you can enter multiple data records in one form. At first glance, a collection form looks like a normal table, but only the records that the user has created are displayed to him. All other records remain hidden from him. Only logged-in users can access links to collection forms.
Web forms always refer to a table in the opened Base. Therefore, you must first open the relevant table and view before creating a form. You can create and save any number of web forms in each Base.
Classic form
Create classic form
Open the form management via the web forms button at the top right of the Base header. If no forms have yet been created in the Base, the form management will appear as an empty list. Otherwise, the existing forms are displayed in the open window.
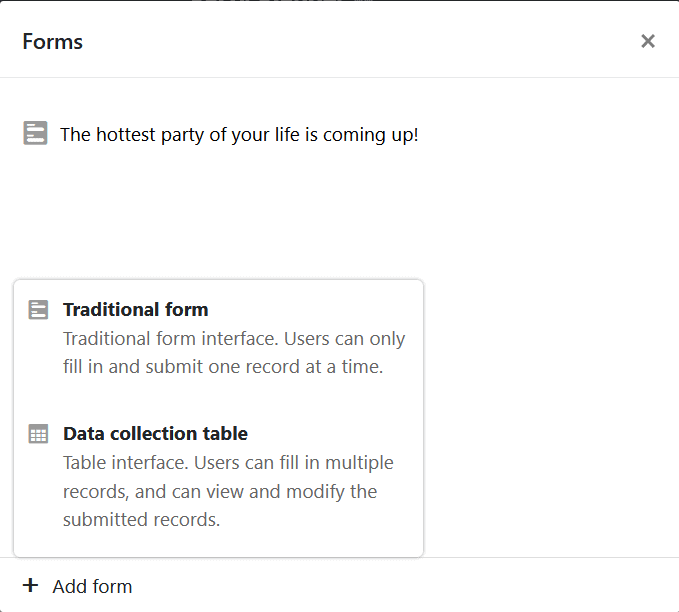
You create a new web form by clicking Create Web Form at the bottom of Form Management and then selecting Classic Form.
Now enter the name of the new web form, which is also displayed in the form management. Use a concise name to keep track of many forms. Of course, you can still adjust the name later.
Clicking the pencil icon opens the web form editor with its two-part view: on the left, the web form is displayed in draft mode, where you have numerous options for editing the form fields; on the right, there are the settings.
There are numerous configuration options to quickly and easily customize a web form to your needs and preferences.
Using the web form settings on the right, you can make the following choices:
- To which table is the form linked?
- Which static elements and table fields do you want to include in the form?
- Should a notification be sent (to you) when the form is submitted?
- Who may access the form?
- Should all fields be mandatory?
- Should "Powered by" be displayed?
- What message is displayed to the participant after submitting the form?
- Do you want to redirect the participant to a website after submitting the form?
- Does the form have a submission deadline?
The fields available in the form depend on the columns in the selected table. When you add or delete columns in the table, the available fields in the settings adjust automatically. The names and the order of the fields are taken directly from the underlying table.
Drag and drop the table fields into your design or click the plus icon to the right of the column name. You can change the order of the fields in the web form as desired by clicking the six-dot icon in the right corner of a field and dragging and dropping the field to the desired location.
In the design you can click on each field, which will take you to the field settings. Per field you can specify whether ...
- a field name different from the column name should be displayed in the form,
- a field receives a supplementary completion note,
- a field is a required field,
- a field should contain a default value,
- the display of the field depends on a condition.
To check how the form looks to the recipient, click the Web Form Page button in the upper right corner. A new tab will then open the form as another user would see it.
Release form
To make the form accessible to others, you need a link. You can obtain the link for the form in the web form editor via the Share button. You can use the automatically generated link or create your own links and extend them with pre-filled values.
Before you send the form link or make it publicly accessible, you should test the form extensively.
Test form
Extensive testing avoids frustration on the part of recipients. Problems can be caused by ambiguities or conflicts in the form. In the worst case, a form cannot be submitted because a mandatory field cannot be filled in (e.g. if no values are defined for a single selection).
Open the web form for testing. From the web form editor this is done via the Web form page button. From the table view, first call up the form administration and then click on the name of the web form. In both cases, the web form opens in a new browser tab.
Values entered in the form are saved in the linked table. Do not forget to delete the test data from the table again before later data collection.
Customise form
You can customize web forms at any time using the web form editor. To return to the editor, enter Forms Management, hover the mouse cursor over the form name, and then click the pencil icon to the right of the name .
Delete form
You can delete web forms at any time using the form management. Move the mouse pointer to the name of the form, and then click the trash icon to the right of the name .
Data collection form
Create collective form
Open the form management via the web forms button at the top right of the Base header. If no forms have yet been created in the Base, the form management will appear as an empty list. Otherwise, the existing forms are displayed in the open window.
To create a new collection form, click Create Web Form at the bottom of Form Management and select Collection Form.
Now enter the name of the new web form, which is also displayed in the form management. Use a concise name to keep track of many forms. Of course, you can still adjust the name later in the form editor.
This opens the collection form editor with its two-part view: on the left, the form is displayed in a preview, and on the right are the collection form settings.
Using the form settings on the right, you can select for each column whether it should be displayed or hidden in the collective form.
To check what the form looks like, click the Collective form button at the top right. The collection form will then open in a new tab. You will see only the entries in the table that you created, i.e. you will see the table as if someone sent you the form link.
You can get the link for the form in the collective form editor via the Share button or via the form administration by clicking on the Share icon to the right of the form name. Now send the link to the recipients.
Adapt collection form
You can customize collection forms at any time using the collection form editor. To return to the editor, access the form manager, move the mouse pointer to the name of the form, and then click the pencil icon to the right of the name .
Delete collective form
You can delete collective forms at any time via the form management. Move the mouse pointer to the name of the form and then click the trash icon to the right of the name .
