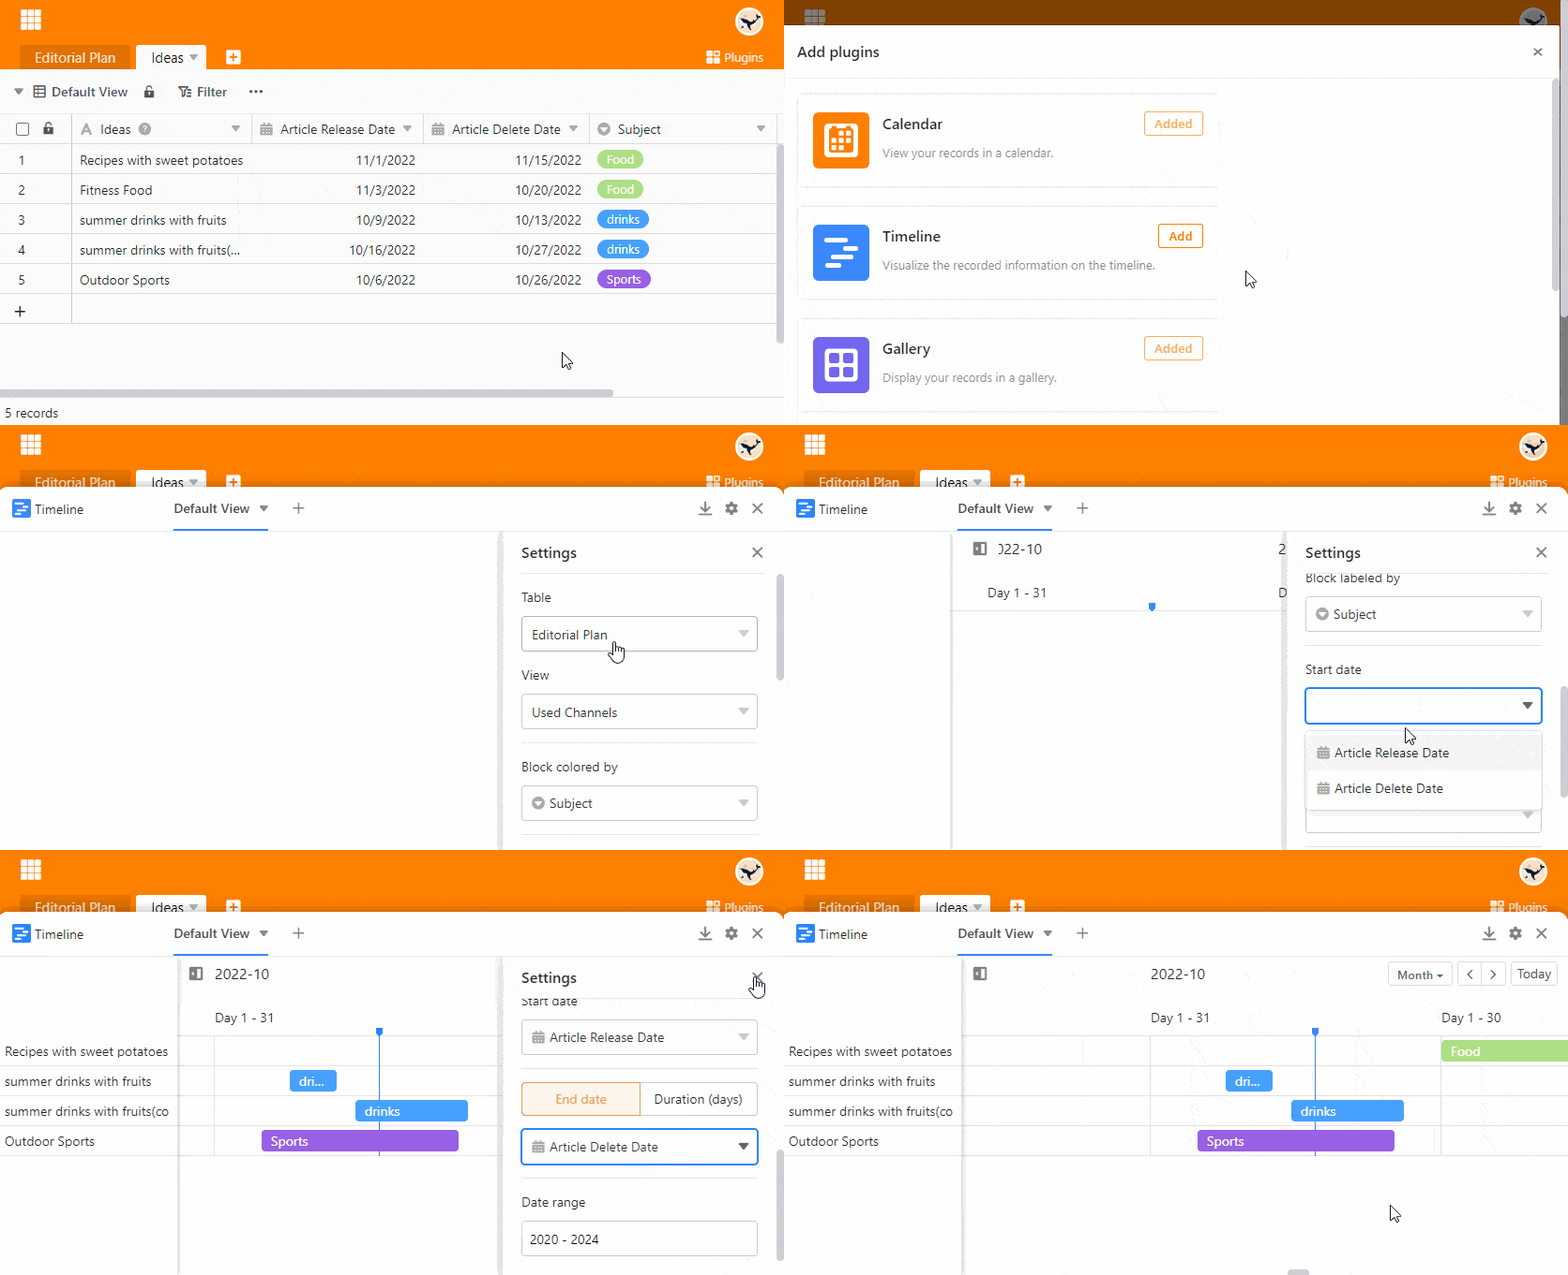
The Timeline plugin allows you to display different time spans in the form of a timeline. This is very useful, for example, if you want to see whether appointments overlap. Accordingly, you can use the Timeline plugin for vacation and project planning or booking (meeting) rooms, among other things.
Read the article Activating a Plugin in a Base to find out how to activate the Timeline plugin.
Function of the timeline plugin
The timeline plugin maps time spans. Therefore, for this representation you need two date columns in a table that define the beginning and the end of a time frame.
How to use the timeline plugin
- Activate and open the timeline plugin.
- Place the Settings of the timeline:
- Table and view
- Block color and label
- Start and end date
- The period of time that the representation should cover
- Double-click on one of the entries to open the row details.
Effect of grouping and sorting
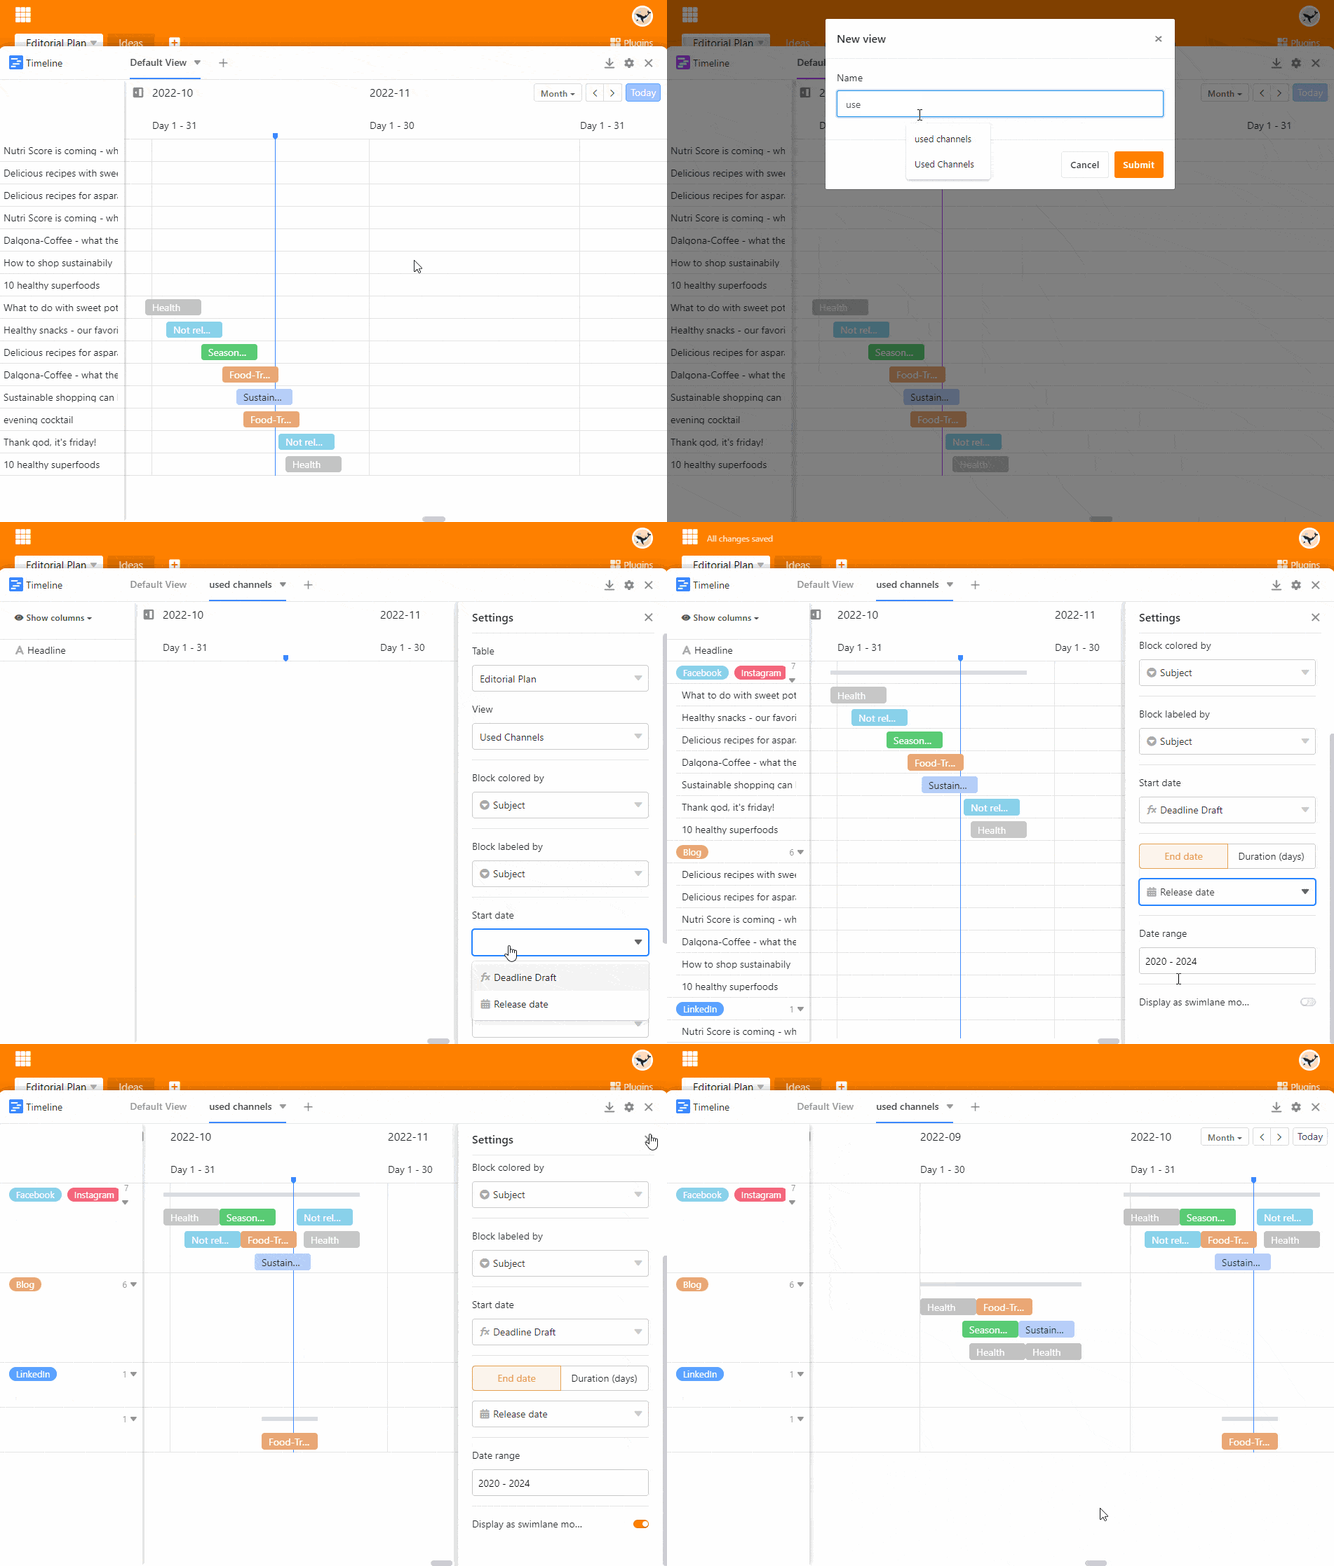
Since the timeline plugin is based on the views of the table, sorting and grouping of entries also affect the display in the timeline. For grouped views, you have the option of displaying the data in a swimlane diagram by activating the Display as swimlane mode slider.
Create multiple timelines
As you can see in the video above, you can also create multiple timelines in one Base. To do this, proceed as follows:
- Click the plus icon to the right of the title of your first timeline.
- Give the timeline a name and confirm with Submit.
- Define in the settings to which table view and which date columns the new timeline should refer to.


