A custom share permission allows you to share multiple tables and views from a Base at the same time. This saves you a lot of work if you want to share numerous tables and views with your team members, but not an entire base.
Despite this bundled sharing, you can define the desired permission in detail, as you can select individually for each table and view whether a read and write share or only a read share should be granted.
For example, you can specify that you grant read and write access to the first table of a base, read-only access to the second table, and no access at all to any other tables.
After you create a custom share, you can send it to individual team members or entire groups.
To create a custom share permission
You have two ways to share individual tables and views of a Base:
- From the home page
- Via the Share icon in Base
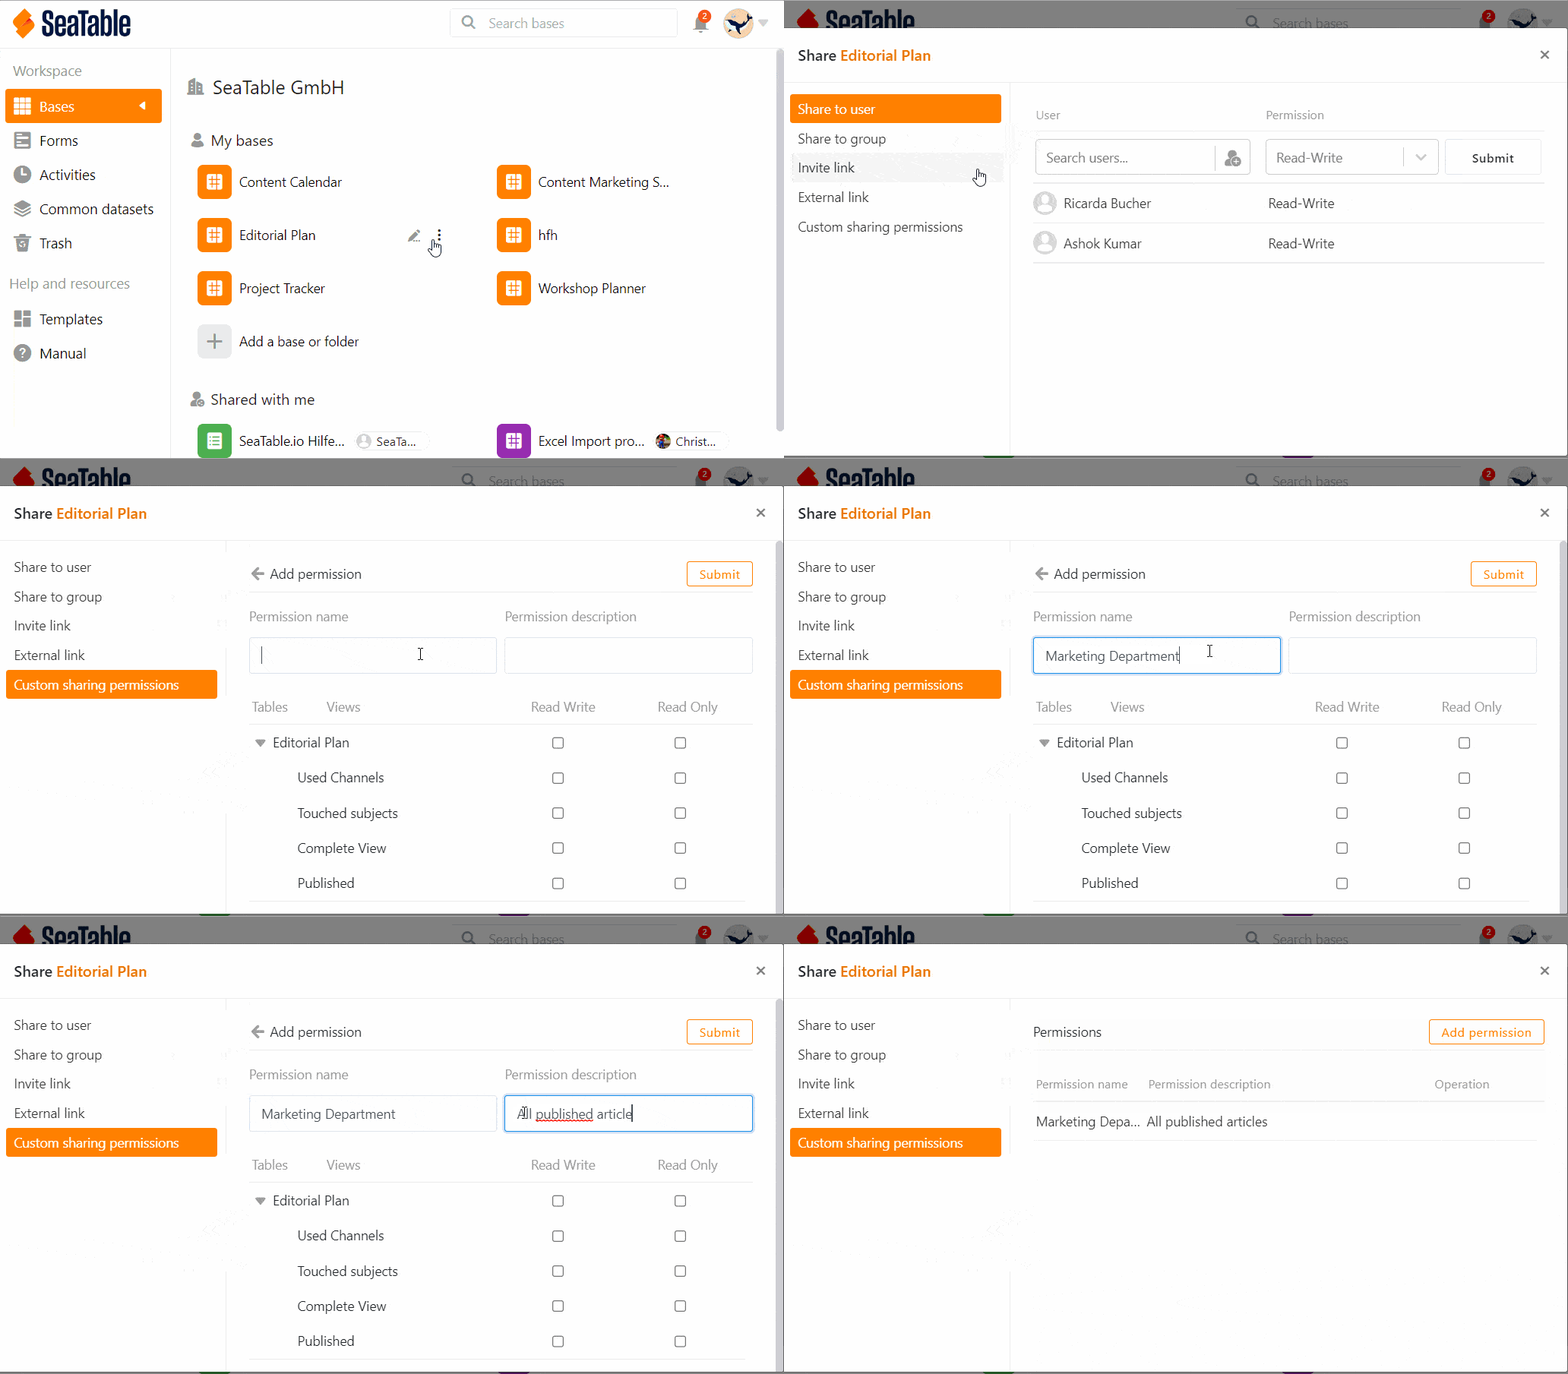
From the home page
- Go to the home page of SeaTable.
- Move the mouse cursor to the base you want to split and click the three dots that appear on the right.
- Click Share.
- Select the Custom share permission menu item.
- Click Add Permission.
- Give the permission a name and add a description.
- Place check marks next to each table and view you want to share, deciding whether you want to assign read and write permissions or read-only perm issions.
Via the Share icon in Base
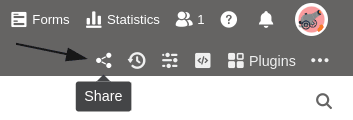
- Open the base from which you want to share individual tables or views.
- In the top right corner of the Base options, click Share .
- Afterwards the same share window opens as in the first way. Follow the click instructions above from step 4 to create the share.
Send the share to users or groups
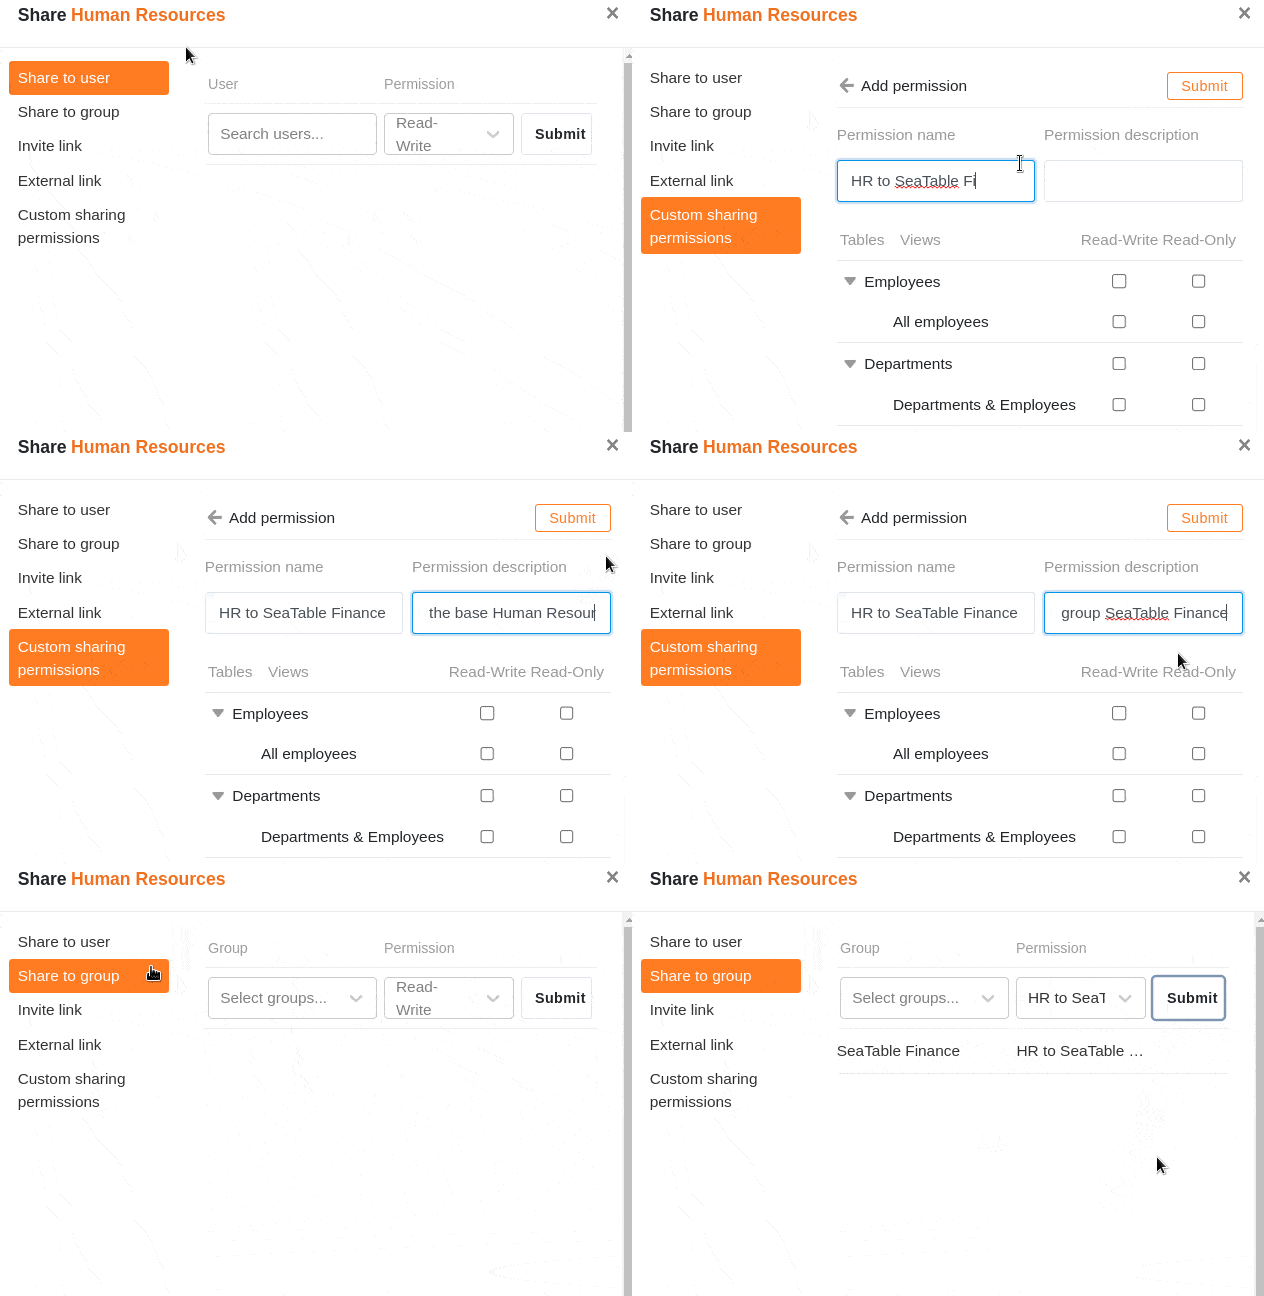
The created share permission is now available as an option under Share for User or Share for Group in the Permissions. To send the custom share, proceed as follows:
- In the left column of the Share window, click Share for Group or Share for User.
- Select the group or users you want to send the custom share to.
- In the Permissions field, you can now select the previously created share permission under the respective name.
- Confirm the release with Submit.
For detailed explanations of what you should consider when sharing with users or groups, see the following articles:
Consequences of the release
Shared tables and views can be found in the group's or user's workspace on the home page. They are always displayed with the note Shared.

Tables and views that are shared for reading only can consequently only be seen and not edited. If you click around in the table, nothing happens:
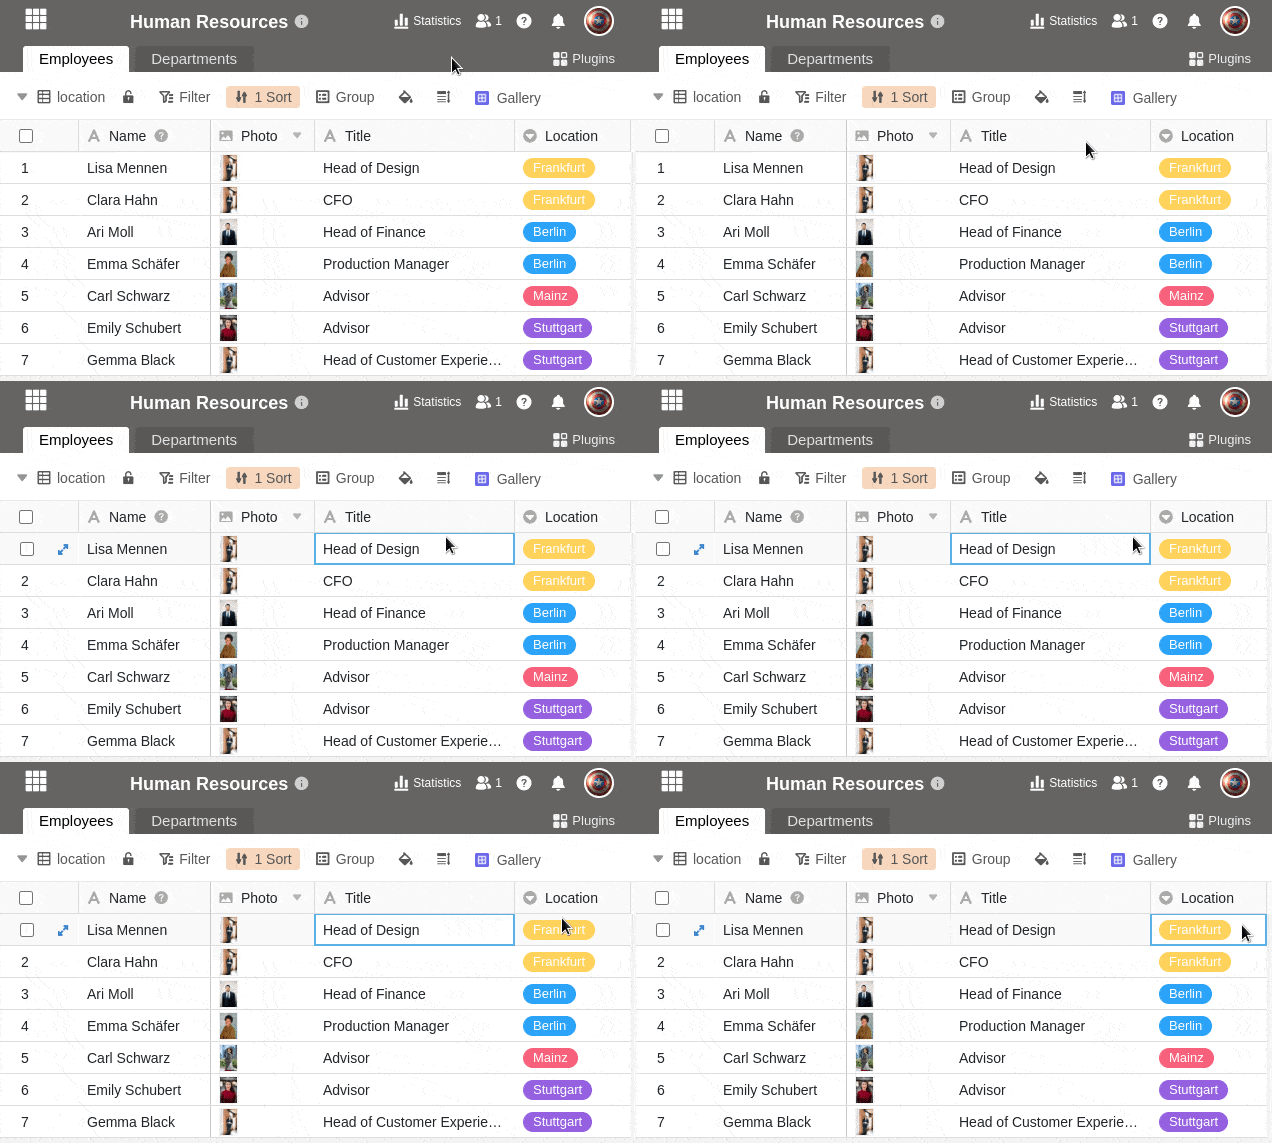
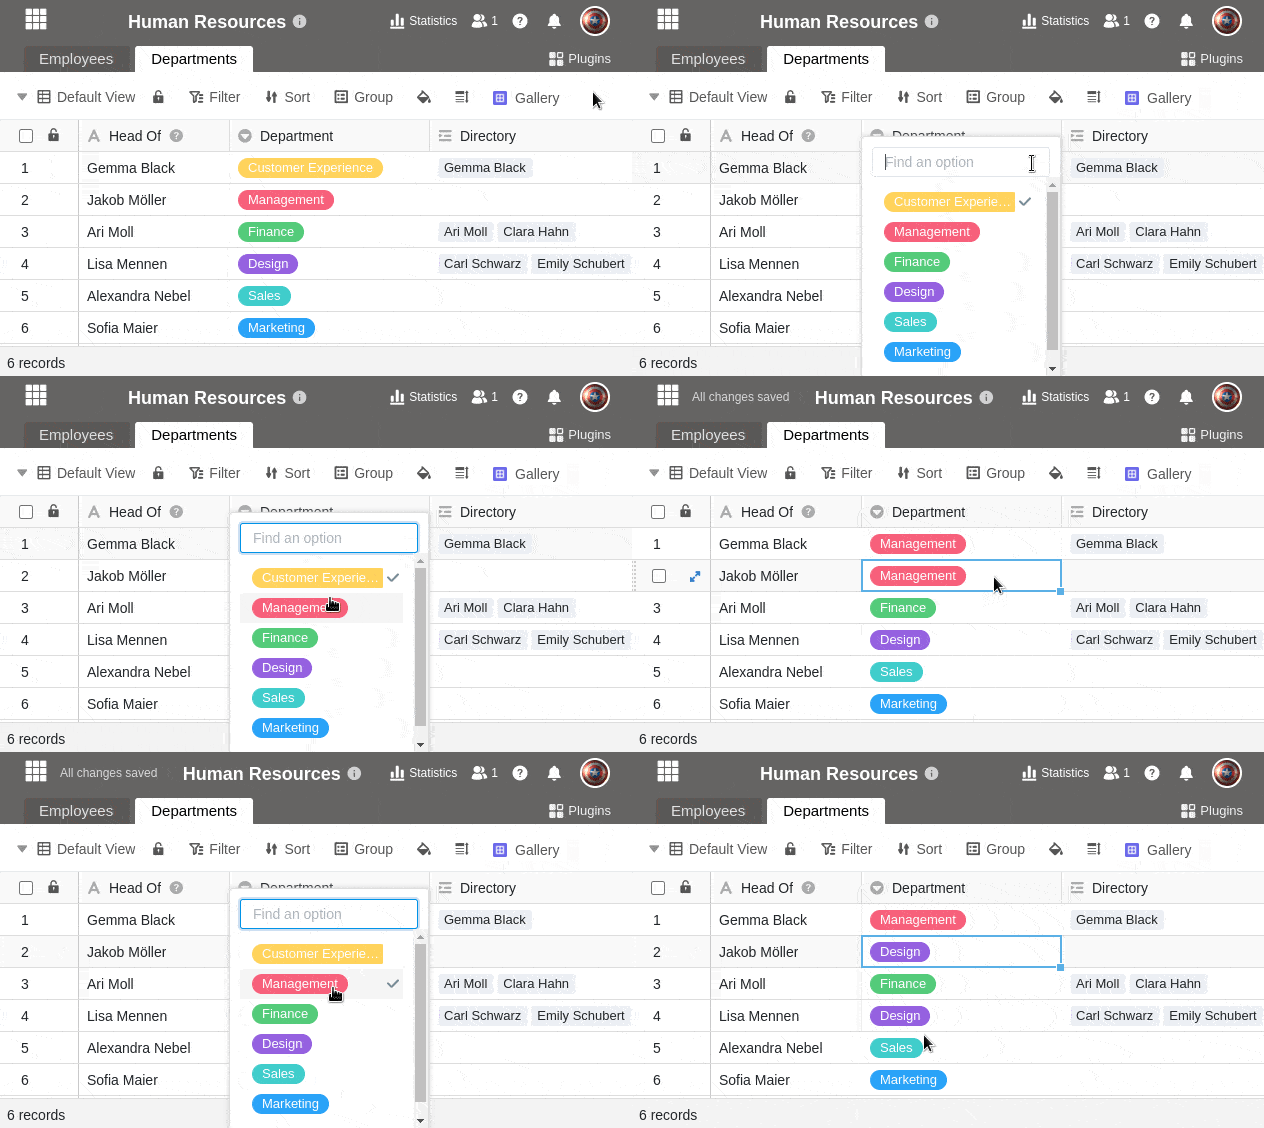
Tables and views that are shared for reading and writing, on the other hand, you can both view and edit. Your changes are visible to all users with access to the table:
Edit custom share permissions
You can change custom share permissions after the fact by removing individual tables and views from the share again or adjusting the type of share.
- Click Custom Share Permissions and hover over the permission you want to customize.
- Click on the pencil icon that appears .
- Now you can change the name and description of the permission.
- Below you have the possibility to remove the checkmarks for individual tables and views of the base or to adjust whether they should be released for reading and writing or only for reading.
- Confirm with Submit to save the release authorization.
Limitations
- You can share tables and views only with groups you are already a member of.
- You can share tables and views of bases you created yourself at any time, while tables and views of bases belonging to a group can be shared with other groups or users only by the owners and administrators.
Frequently asked questions
When does a custom share make sense?
In SeaTable you should always enter related records in the same base. Now, if you want to share only a part of the data with someone, custom shares are the way to go.
Is it possible to share a custom share via a link?
No, you can currently only send custom shares to a team member or group.
